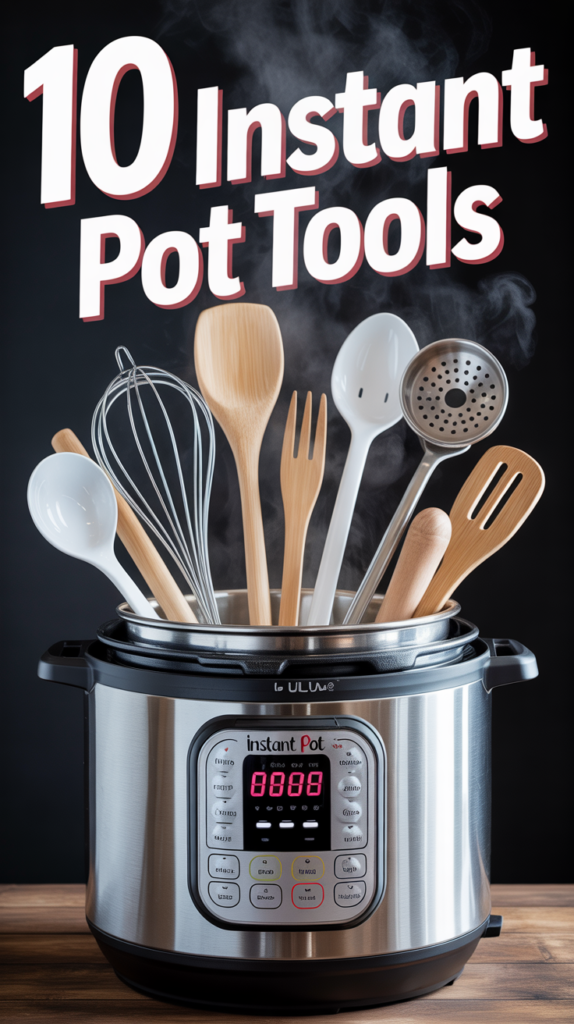
10 Instant Pot Tools That Make Pressure Cooking Less Scary (and Way More Fun)
If your Instant Pot kind of intimidates you, you’re not alone. That hiss! Those buttons! The dreaded burn notice! Here’s the secret: the right tools turn your pressure cooker into a reliable kitchen buddy that basically cooks dinner while you’re halfway through an episode. I’m walking you through the ten must-have Instant Pot tools, plus exactly how to use them—so you can feel confident, safe, and wildly efficient. Ready to level up?
If you love how the Instant Pot does the work for you, you’ll want to check out our full guide to 10 Easy Instant Pot Dinners for Busy Weeknights for more cozy, hands-off meals.
10 Instant Pot Tools That Make Pressure Cooking Less Scary (and Way More Fun)
1. Silicone Sealing Ring Set That Stops Mystery Smells
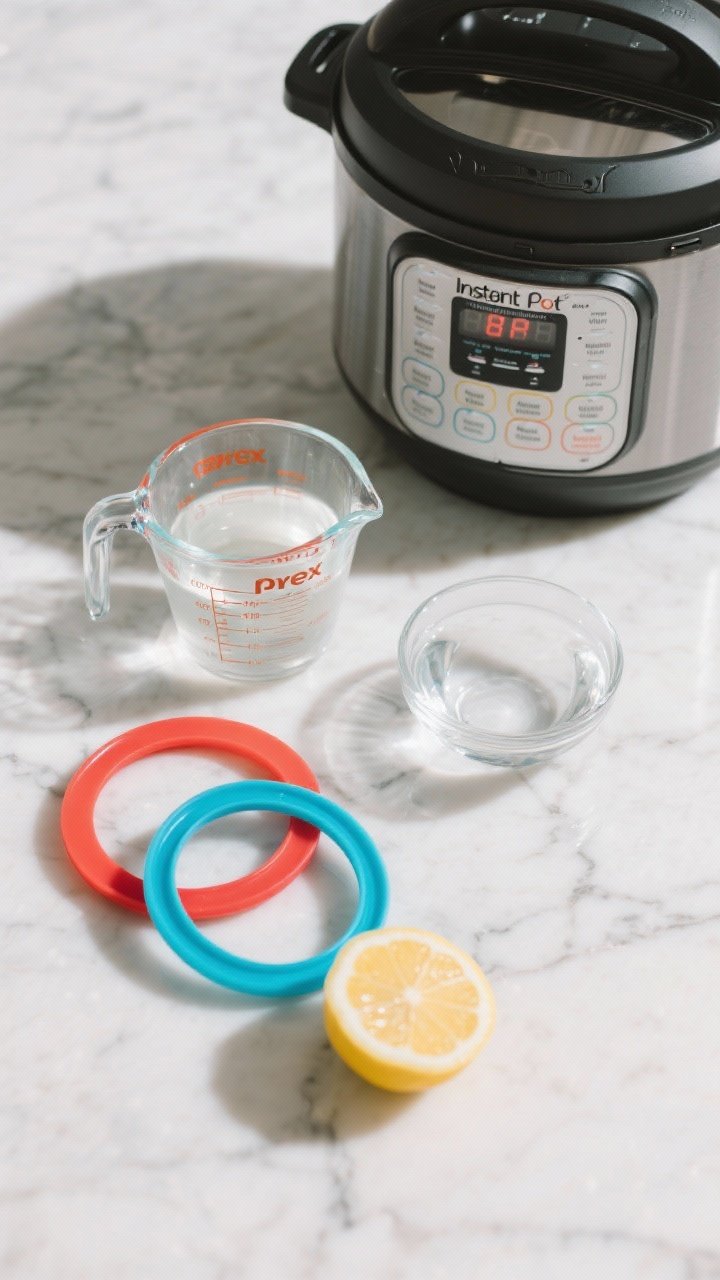
The silicone sealing ring is the Instant Pot’s MVP—and the reason your chili doesn’t taste like last week’s cheesecake. Rings absorb odors like sponges, so having a color-coded set (sweet vs. savory) keeps flavors clean and consistent. Bonus: swapping out old rings prevents sealing issues and anxiety-inducing steam leaks.
Ingredients: What You Need for a Ring Refresh
- 2–3 food-grade silicone sealing rings (sized for your model: 3, 6, or 8 qt)
- 1 cup white vinegar (for deodorizing)
- 2 cups water
- 1 lemon, sliced (optional)
Instructions: Deodorize and Label Like a Pro
- Pop out your current ring and inspect it. If it’s cracked, stretched, or super smelly—replace it.
- To deodorize a usable ring: seat it in the lid, add water, vinegar, and lemon to the pot. Run Steam for 2 minutes, then quick release.
- Air-dry the lid upside down. The ring should smell neutral.
- Label rings: blue for “savory,” white for “desserts,” or whatever code thrills you.
Pro tip: Replace rings every 12–18 months, especially if you cook lots of strong flavors. Keep a spare on hand to avoid last-minute panic.
2. Tempered Glass Lid for Stress-Free Sauté and Serving
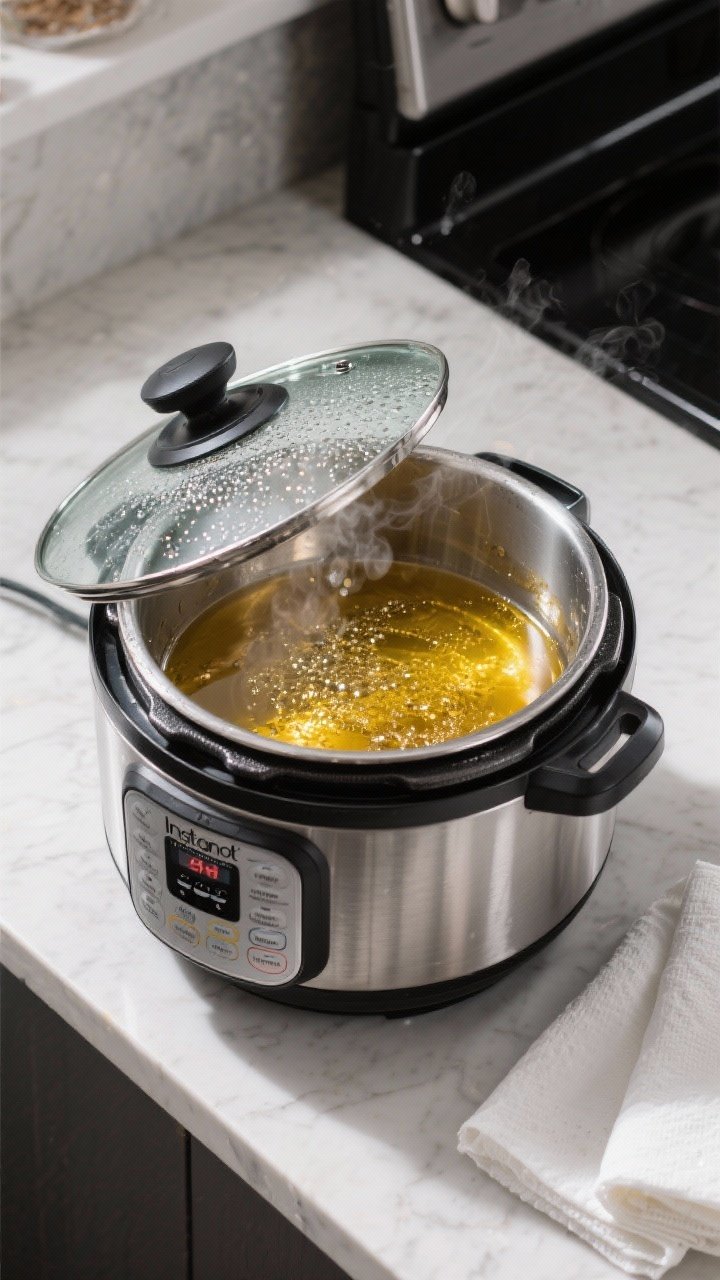
The tempered glass lid turns your Instant Pot into a skillet, soup pot, and serving dish. It’s perfect for Sauté mode (no locking lid needed), simmering, and keeping dinner warm at the table without that pressure-lid bulk. You’ll use it constantly.
Ingredients: Essentials for Better Browning
- 1 tempered glass lid (model-specific)
- 1–2 tablespoons high-heat oil (for Sauté sessions)
- Paper towels or a clean kitchen towel
Instructions: Sauté and Simmer With Confidence
- Switch to Sauté, add oil, and brown meat or veggies with the glass lid slightly ajar to reduce splatter.
- Deglaze with a splash of broth or wine, scraping up browned bits to avoid burn notices later.
- When cooking’s done, switch to Keep Warm and cover with the glass lid to hold heat for serving.
- Hand-wash the lid and wipe the silicone rim to keep it spotless.
Variation: Use the glass lid during yogurt incubation or proofing dough for consistent temps without oversteaming.
📥 Save Time This Week!
Get our FREE 7-Day Dinner Plan + Grocery List — all the recipes, shopping lists, and meal prep tips you need to breeze through the week.
Instant download. No spam, just delicious dinners. Unsubscribe anytime.
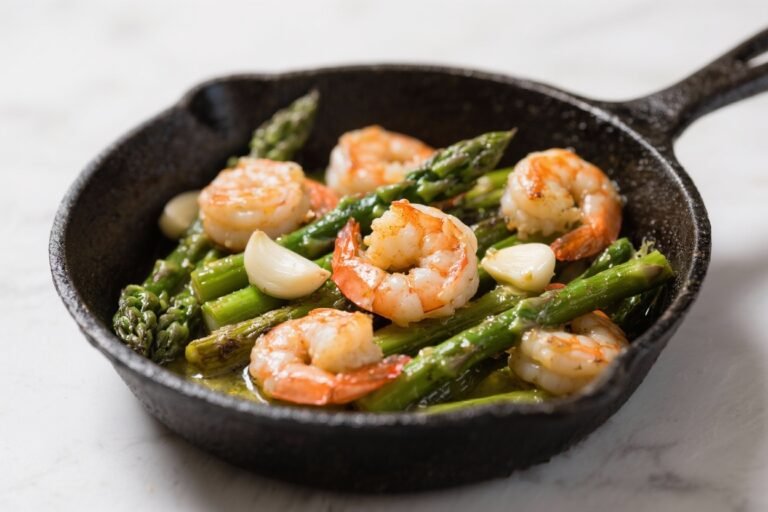
3. Steamer Basket and Trivet Duo for Foolproof Veggies and Eggs
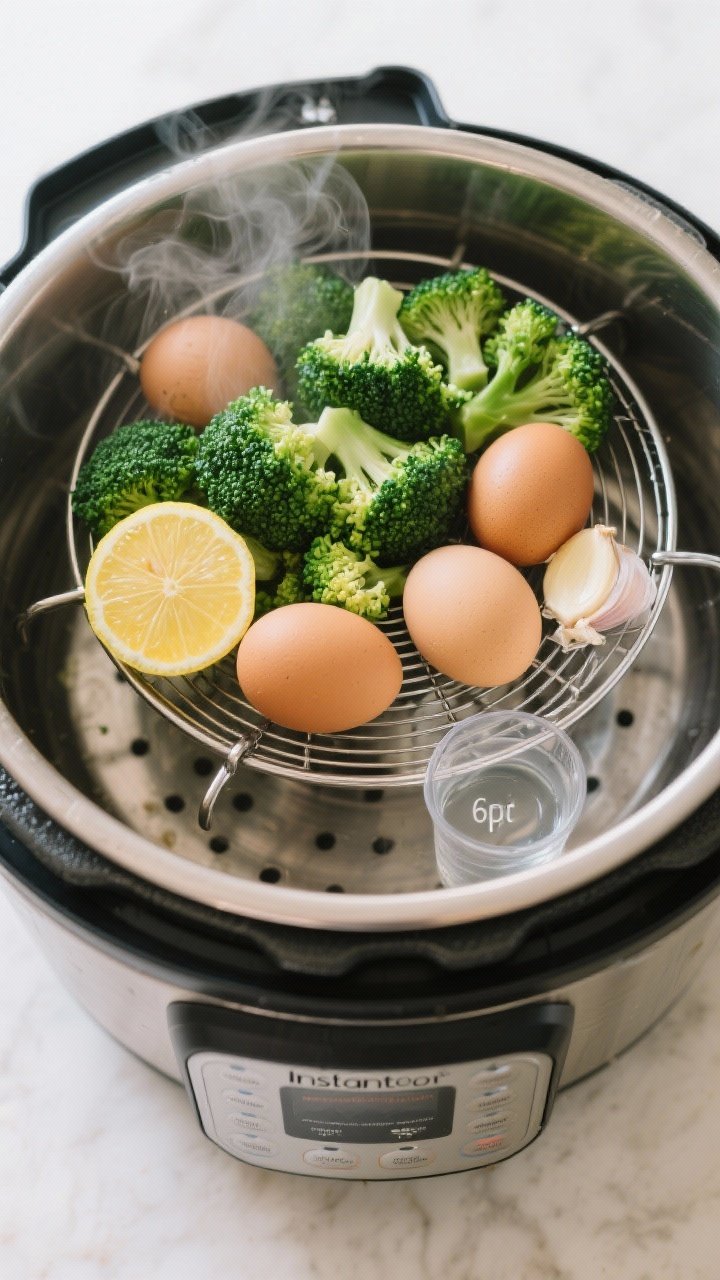
A stainless-steel steamer basket plus the trivet keeps food lifted off the bottom for even cooking—no soggy asparagus or cracked eggs. It’s the easiest way to nail healthy sides, batch eggs, and delicate seafood without babysitting.
Ingredients: The Steam Setup
- 1 trivet (the one that came with your pot works great)
- 1 stainless-steel or silicone steamer basket
- 1 cup water (6 qt) or 1.5 cups (8 qt)
- Optional: lemon slices, garlic cloves, or herbs for aromatic steam
Instructions: Crisp-Tender Veg and Perfect Eggs
- Pour water into the pot, add the trivet, then set the steamer basket on top.
- For veggies: add produce to the basket, season lightly, and pressure cook on High for 0–2 minutes depending on firmness.
- For eggs: add 6–12 eggs in the basket, cook High Pressure for 5 minutes, natural release 5 minutes, then ice bath.
- Lift out the basket using the handle. No fishing around with tongs!
Pro tip: Toss veggies with olive oil, lemon, and flaky salt right after steaming. For seafood, line the basket with parchment and cook 1–3 minutes on High.
4. Nonstick Springform Pan for Cheesecake That Actually Releases

The Instant Pot makes dreamy cheesecake—but only if you have a springform pan or push pan that fits your model. Moist heat eliminates cracks, and the pan ensures a clean release. Dessert that doesn’t stress you out? A win.
Ingredients: Your Cheesecake Toolkit
- 7-inch springform or push pan (for 6-qt), or 8-inch (for 8-qt)
- Aluminum foil (to make a sling)
- Parchment paper (for the bottom)
- 1.5 cups water for the pot
Instructions: Set Up for Set-and-Forget Cheesecake
- Line the pan base with parchment and clip closed. Grease the sides.
- Pour batter into the pan, tap to release bubbles, and cover the top loosely with foil.
- Make a foil sling (a long strip) to lower and lift the pan safely.
- Add water to the pot, place the trivet, set in the pan, and cook under High Pressure per your recipe (usually 28–35 minutes).
- Natural release for 10–15 minutes. Chill completely before unmolding.
Variation: Use the same pan for lasagna, frittata, or deep-dish mac and cheese. It’s not just for sweets.
5. Extra Inner Pot to Speed Up Weeknights
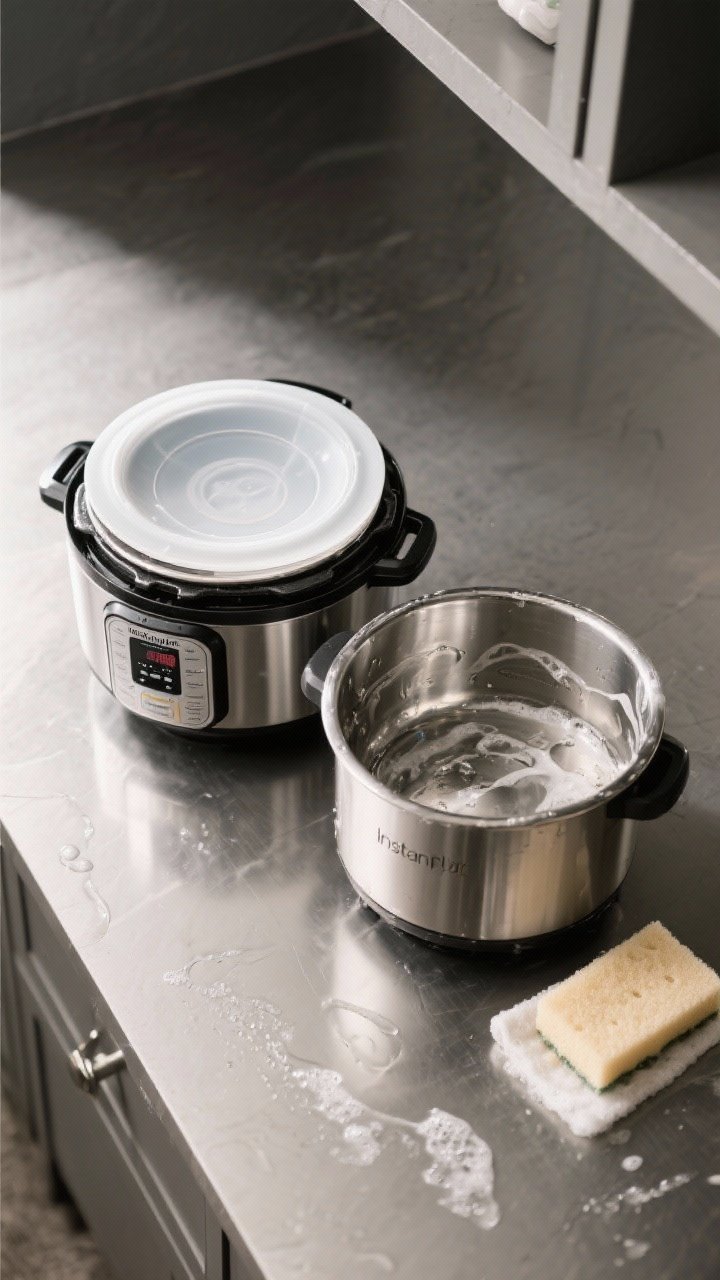
Two words: backup pot. An extra stainless-steel inner pot means you can cook rice, then immediately make curry—no washing between courses. It’s also clutch for meal prep or if your first pot is chilling in the fridge with leftovers.
Ingredients: The Double-Pot Dream
- 1 extra inner pot (match your model size)
- Silicone lid or tight-fitting cover for storing
- Soft sponge and mild detergent for care
Instructions: Seamless Swap Strategy
- Cook your first dish (say, rice). Remove the inner pot and set aside covered.
- Drop in the second pot, and start your main dish immediately. No waiting, no scrubbing.
- After dinner, store leftovers directly in the pot with a silicone lid.
- Rotate pots through the week to keep cooking continuous and cleanup easy.
Pro tip: If you make yogurt or proof dough, dedicate one inner pot to low-odor tasks to keep flavors pure.
6. Long Tongs and Silicone Mitts for Safe, Steady Lifts
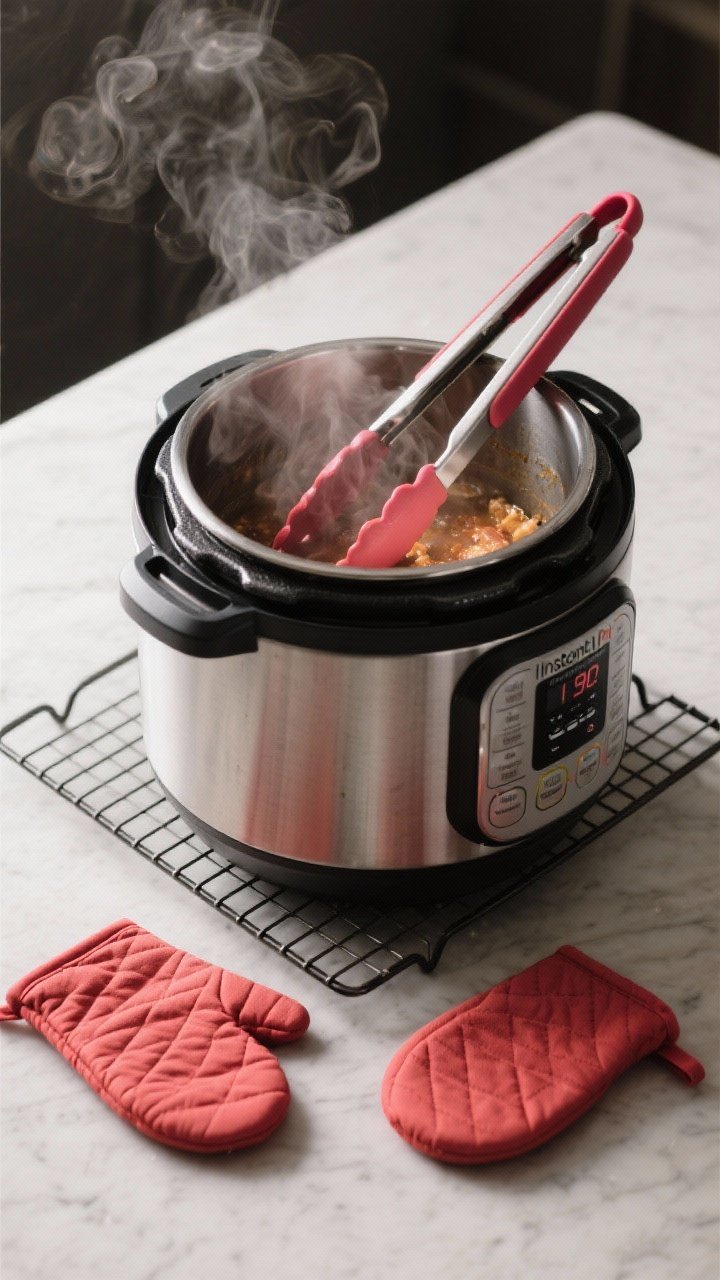
Burned fingers are a mood killer. Long silicone-tipped tongs and heat-resistant mini mitts give you a secure grip when lifting hot trivets, pans, and baskets. You’ll feel way calmer during quick releases and transfers.
Ingredients: Safety First
- 12-inch silicone-tipped tongs
- Pair of silicone mini mitts or pinch grips
- Cooling rack (optional, for staging hot inserts)
Instructions: Master the Lift-and-Shift
- When pressure cooking ends, quick release steam with your mitt-protected hand angled away from your face.
- Use tongs to grab the trivet handles, foil sling, or steamer basket handle.
- Transfer hot inserts to a cooling rack, not directly on countertops.
- Keep mitts on while removing the lid to avoid surprise drips of hot condensation.
Pro tip: Store mitts inside the lid handle so they’re always within reach when the timer beeps.
7. Glass Measuring Cup and Fat Separator for Silky Sauces

Instant Pot meals shine with sauce, but grease can make them heavy. A microwave-safe glass measuring cup and a fat separator help you thicken and brighten sauces with control. Think glossy gravies and tangy pan juices, minus the oil slick.
Ingredients: Sauce Support
- 4-cup glass measuring cup (with spout)
- 1 fat separator (2–4 cup capacity)
- 1–2 tablespoons cornstarch or arrowroot
- 2 tablespoons cold water (for slurry)
- Salt, pepper, and acid (lemon juice or vinegar) to finish
Instructions: Clear, Glossy Sauce in Minutes
- After cooking, pour the cooking liquid into the fat separator and let it settle for 3–5 minutes.
- Decant the de-fatted liquid into the pot on Sauté mode.
- Whisk cornstarch with cold water, then stream it into the simmering liquid.
- Cook 1–2 minutes until glossy. Finish with salt and a splash of acid to wake it up.
Variation: For dairy-free creaminess, blend in a spoonful of tahini or cashew butter using an immersion blender.
8. Stainless Steel Pot-in-Pot (PIP) Bowl for One-Pot, Two-Dish Magic
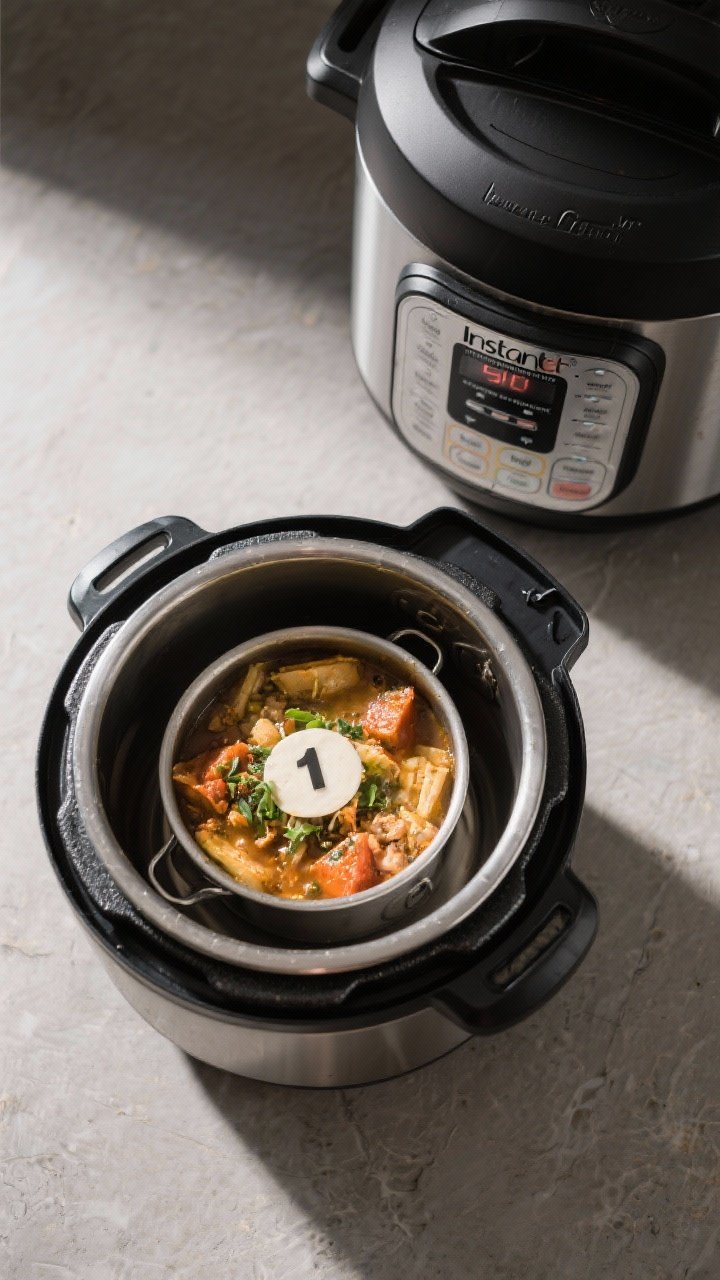
Pot-in-Pot cooking is a game changer: cook curry below and rice above, or steam fish over saucy beans. A stainless-steel PIP bowl (or oven-safe glass) lets you stack and multitask safely—no flavor mingling where you don’t want it.
Ingredients: Stack and Conquer
- One oven-safe stainless or tempered glass bowl that fits inside your pot
- Trivet with handles
- 1–1.5 cups water for the base of the Instant Pot
- Foil or silicone lid for the inner bowl (to prevent drips)
Instructions: Two Courses, One Cook
- Add water to the Instant Pot and place the trivet inside.
- Put your main (like chicken tikka masala) in the base of the pot.
- Place rinsed rice and water in the PIP bowl, cover with foil, and set it on the trivet above the main.
- Cook on High Pressure per the main dish timing; both finish together like magic.
Pro tip: For delicate dishes in the PIP bowl (custards, fish), lower the time and use natural release to avoid overcooking.
9. Spare Float Valve, Anti-Block Shield, and Gasket Kit for Zero-Drama Sealing
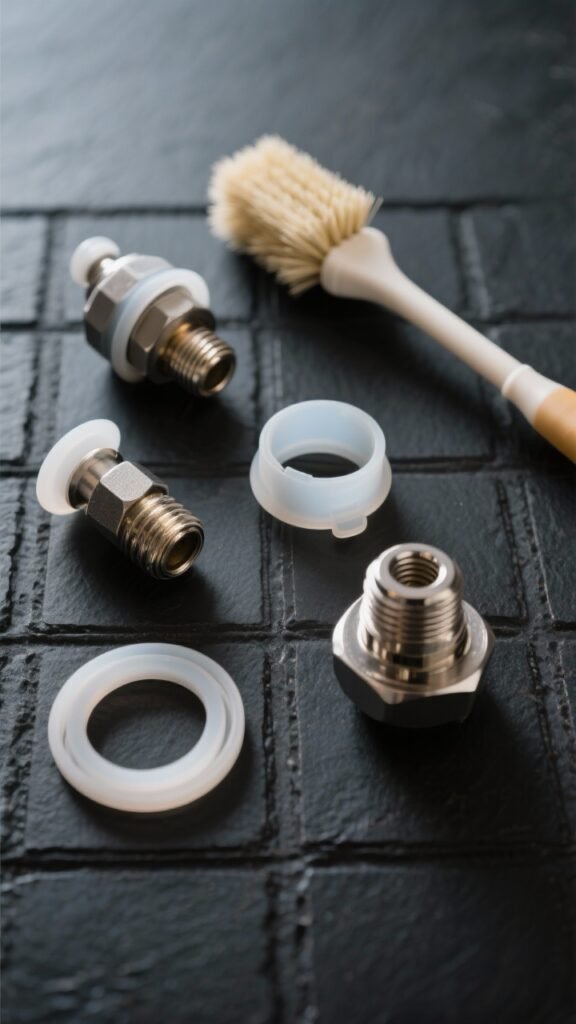
Nothing derails dinner like a seal failure. Keeping a tiny spare parts kit—float valve, silicone cap, anti-block shield, and lid gasket—means you can fix issues on the spot. It’s the Instant Pot equivalent of having a phone charger in your bag: always smart.
Ingredients: The Emergency Fix Pack
- Replacement float valve
- Silicone float valve cap
- Anti-block shield (steam release cover)
- Steam release valve gasket
- Soft brush for cleaning
Instructions: Quick Fixes for Common Sealing Problems
- If your pot won’t come to pressure, check the float valve for free movement and intact silicone cap.
- Pop off the anti-block shield under the lid, scrub it clean, and re-seat it firmly.
- Inspect the steam release valve gasket; replace if warped or loose.
- Try again with at least 1 cup of liquid. Most issues vanish with a clean shield and proper seal.
Pro tip: Store spare parts in a small zip bag inside the Instant Pot so you never hunt for them mid-dinner.
10. Digital Thermometer and Timer for Doneness You Can Trust
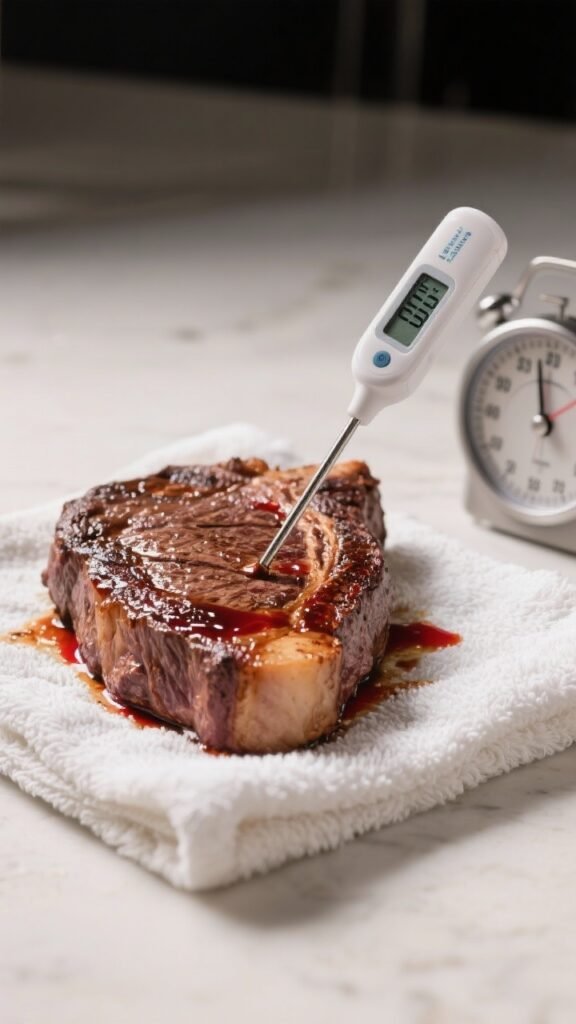
Even with pressure cooking, carryover heat is real. A quick-read digital thermometer and a reliable kitchen timer erase guesswork so meats are juicy, not overdone. This combo is your ticket to consistent results every time.
Ingredients: Precision Partners
- Instant-read digital thermometer
- Kitchen timer or phone timer
- Clean towel for resting meat
Instructions: Hit Your Temps, Nail Your Meal
- Once cooking is complete and pressure is released, check internal temps: 165°F for poultry, 145°F for pork, 125–135°F for medium-rare beef (adjust to preference).
- If below target, switch to Sauté and finish for 1–3 minutes, or close the lid to gently carryover cook.
- Rest meats under a tent of foil for 5–10 minutes to reabsorb juices.
- Use the timer to track natural releases—those extra minutes matter more than you think.
Variation: For delicate proteins like salmon, aim for 120–125°F and use quick release to avoid overcooking.
How These Tools Make Pressure Cooking Feel Easy
Put simply: they remove the “what ifs.” The sealing ring solves flavors, the glass lid helps you sauté like a human and not a fire hazard, the steamer basket makes sides a breeze, and the PIP bowl doubles your output. Safety tools and spare parts keep stress low, while a thermometer and separator sharpen your finish. It’s the difference between “hope this works” and “I’ve got this.”
Ready to fall in love with your Instant Pot again? Grab a few of these tools and try them tonight—seriously, even one or two will change your whole routine. Dinner just got a lot less scary and a lot more delicious.
Printable Recipe Card
Want just the essential recipe details without scrolling through the article? Get our printable recipe card with just the ingredients and instructions.