10 Air Fryer Accessories That Are Actually Worth It (and What to Cook First)
If your air fryer is gathering dust, it’s not you—it’s the missing gear. The right accessories turn that countertop gadget into a tiny, turbocharged oven that bakes, roasts, dehydrates, and even grills. Today, we’re going beyond the shopping list and giving you exactly what to make with each accessory, so you can put them to work immediately.
We’re talking crispy fries without flipping, steak with legit grill marks, and cookies that bake evenly. Ready to cook smarter? Let’s dive in.

10 Air Fryer Accessories That Are Actually Worth It
If you’re looking for quick and easy to prepare recipes for your air fryer, you’ll want to check out our full guide to 10 Easy Air Fryer Dinners for Busy Weeknights for more soulful, fast meals.
📥 Save Time This Week!
Get our FREE 7-Day Dinner Plan + Grocery List — all the recipes, shopping lists, and meal prep tips you need to breeze through the week.
Instant download. No spam, just delicious dinners. Unsubscribe anytime.
1. Perforated Parchment Liners: The “No-Scrub” Crispy Chicken Bites
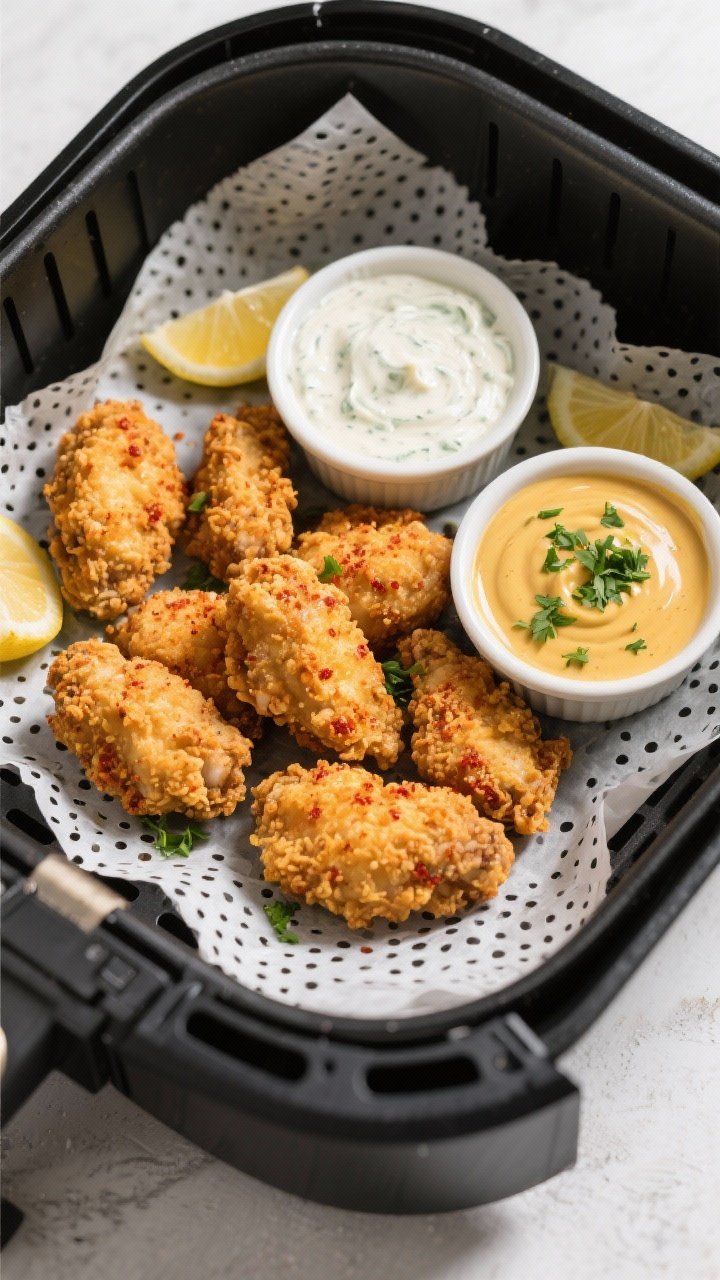
These perforated parchment liners save you from scrubbing stuck-on bits while keeping airflow for that magical crisp. They’re perfect for weeknight chicken bites—juicy inside, golden outside, and zero soggy bottoms. Ideal for meal prep, game night, or feeding picky eaters fast.
Ingredients:
- 1.5 lb chicken breast, cut into 1-inch pieces
- 2 tbsp olive oil
- 1 tsp smoked paprika
- 1 tsp garlic powder
- 1/2 tsp onion powder
- 1/2 tsp kosher salt
- 1/2 tsp black pepper
- 1/4 tsp cayenne (optional)
- 1 tbsp cornstarch
- Lemon wedges, for serving
Instructions:
- Line your air fryer basket with a perforated parchment liner (add it after preheating to avoid flyaway).
- Preheat to 400°F (200°C) for 3 minutes.
- In a bowl, toss chicken with olive oil, spices, salt, pepper, and cornstarch until evenly coated.
- Spread chicken in a single layer. Air fry 8–10 minutes, shaking halfway, until crisp and internal temp hits 165°F (74°C).
- Rest 2 minutes. Squeeze lemon over the top.
Serve with garlic yogurt dip or buffalo sauce. Want variety? Swap smoked paprika for lemon pepper, or toss hot-out-the-fryer bites in honey and chili flakes for a sticky-sweet finish.
2. Skewer Rack: Street-Style Chili-Lime Shrimp Skewers
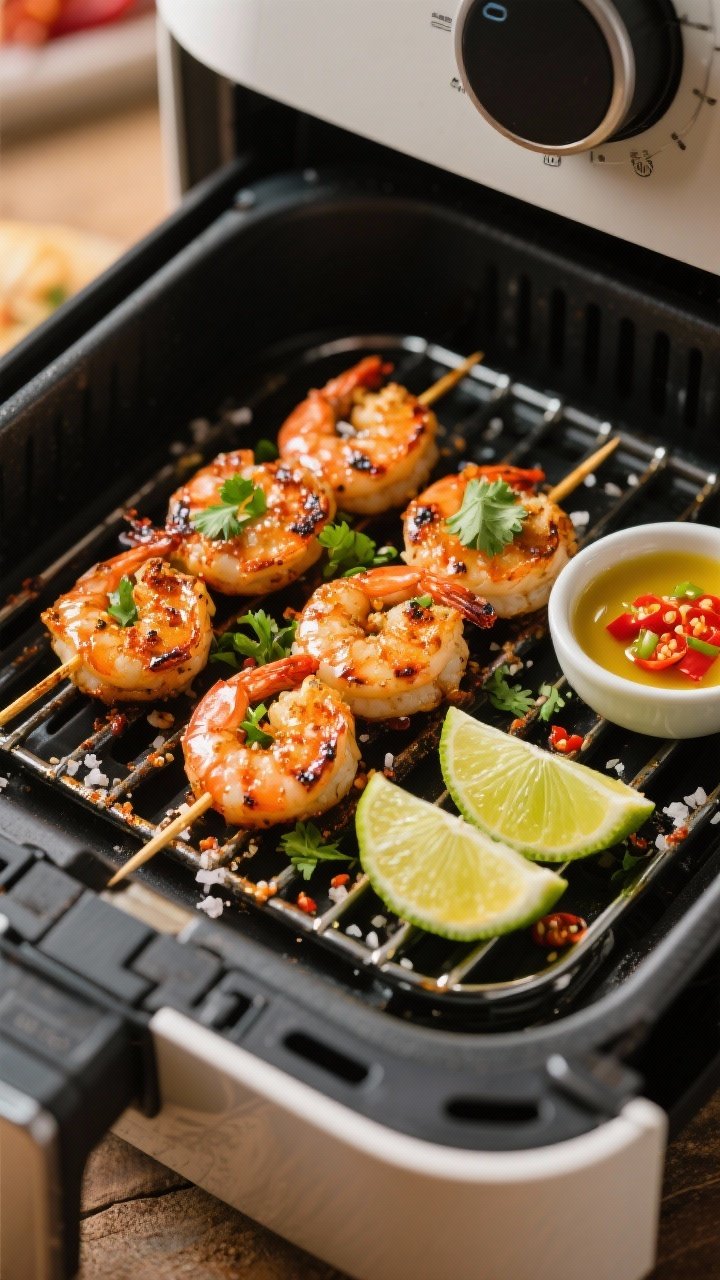
The skewer rack keeps food elevated, so hot air hits all sides—no flipping required. It’s a game-changer for shrimp, which cook in minutes and soak up a punchy marinade. Perfect for tacos, rice bowls, or cocktail hour.
Ingredients:
- 1 lb large shrimp, peeled and deveined
- 1 tbsp olive oil
- 1 tbsp lime juice
- 1 tsp lime zest
- 1 tsp chili powder
- 1/2 tsp cumin
- 1/2 tsp kosher salt
- 1/4 tsp black pepper
- 1 garlic clove, minced
- Fresh cilantro, chopped (for garnish)
- Lime wedges, to serve
Instructions:
- Soak wooden skewers 15 minutes if using. Preheat the air fryer to 390°F (200°C).
- Mix oil, lime juice/zest, chili powder, cumin, salt, pepper, and garlic. Toss shrimp to coat. Marinate 10 minutes.
- Thread shrimp onto skewers. Arrange on the skewer rack in a single layer.
- Air fry 5–7 minutes until opaque and lightly charred at edges.
- Garnish with cilantro and a squeeze of lime.
Serve over coconut rice or tuck into warm tortillas with avocado. For heat lovers, add a pinch of cayenne to the marinade. Don’t overcook—shrimp finish fast!
3. Grill Pan Insert: Bistro-Style Cast-Iron Steak Frites
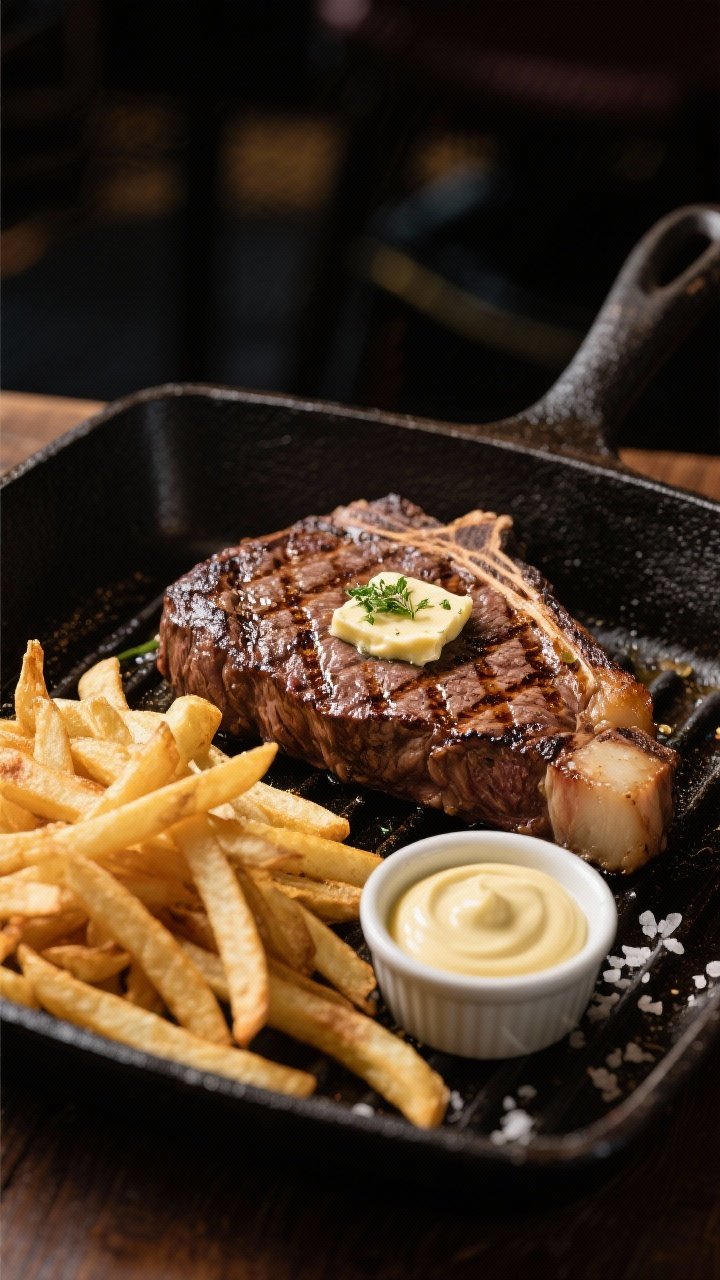
A grill pan insert gives you real sear marks and better browning. You get that steakhouse vibe without smoking out your kitchen. Pair with quick air fryer fries for a weeknight upgrade.
Ingredients:
- 1 lb boneless ribeye (about 1 inch thick)
- 1 tsp kosher salt
- 1/2 tsp black pepper
- 1 tbsp neutral oil (avocado or canola)
- 2 tbsp softened butter
- 1 tsp Dijon mustard
- 1 tsp chopped fresh thyme
- 12 oz frozen thin-cut fries
Instructions:
- Pat steak dry. Season with salt and pepper. Rub with oil.
- Preheat air fryer with grill pan insert inside at 400°F (200°C) for 5 minutes (preheating is key for sear).
- Mix butter with Dijon and thyme; set aside.
- Air fry steak 8–10 minutes, flipping halfway, for medium-rare (target 130°F/54°C). Rest 5 minutes, then top with Dijon-thyme butter.
- While steak rests, crank heat to 425°F (220°C) and cook fries 8–12 minutes, shaking halfway, until crisp.
Slice steak against the grain and serve over fries for full bistro vibes. Swap the butter for garlic-herb or blue cheese if you’re feeling fancy. For thicker steaks, add 2–3 minutes and use a thermometer.
4. Baking Pan: One-Pan Honey-Garlic Salmon With Roasted Veg
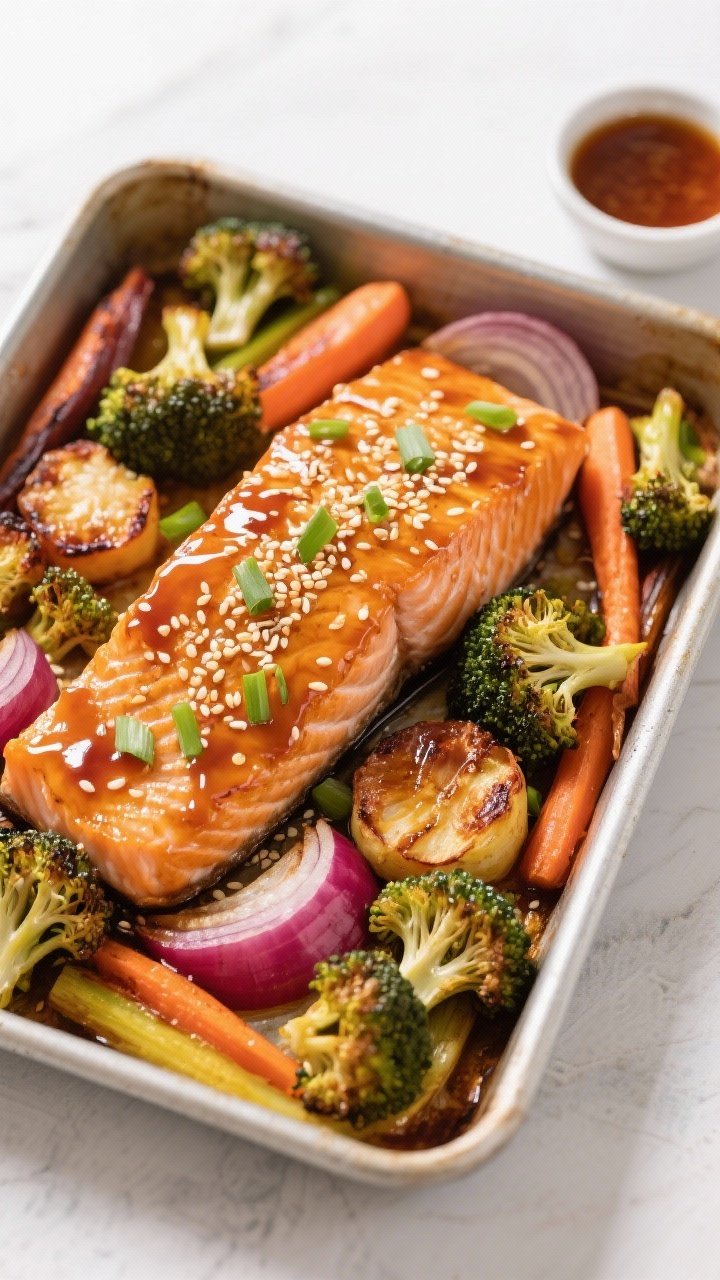
A fitted baking pan turns your air fryer into a tiny sheet pan situation—great for saucy stuff that would drip in a basket. This honey-garlic salmon is sweet, savory, and weeknight-friendly, with tender veggies on the side.
Ingredients:
- 2 salmon fillets (6 oz each), skin-on
- 1 cup broccoli florets
- 1 cup diced sweet potato (1/2-inch)
- 1 tbsp olive oil
- 1/2 tsp kosher salt, divided
- 1/4 tsp black pepper
- 2 tbsp honey
- 1 tbsp soy sauce
- 1 tsp rice vinegar or lemon juice
- 2 garlic cloves, minced
- Pinch red pepper flakes (optional)
Instructions:
- Preheat air fryer to 390°F (200°C). Lightly oil the baking pan.
- Toss broccoli and sweet potato with olive oil, half the salt, and pepper. Spread in the pan and cook 8 minutes.
- Whisk honey, soy, vinegar, garlic, and red pepper flakes.
- Push veg to the sides; nestle salmon in the center, skin-side down. Season salmon with remaining salt and brush with sauce.
- Air fry 7–9 minutes, until salmon flakes and veg are tender.
Drizzle extra sauce from the pan over everything. Add sesame seeds and scallions if you like. Swap salmon for chicken thighs (add 6–8 minutes) or tofu (press well and reduce time by 2 minutes).
5. Silicone Egg Bites Mold: Cheddar-Chive Egg Bites (Starbucks Who?)

The silicone egg bites mold is brilliant for breakfast meal prep—no sticking, easy portioning, and perfectly tender eggs. These are cheesy, herby, and freezer-friendly. Brunch in a pinch, every time.
Ingredients:
- 6 large eggs
- 1/4 cup cottage cheese or Greek yogurt
- 1/4 cup milk
- 1/2 tsp kosher salt
- 1/4 tsp black pepper
- 1/2 cup shredded sharp cheddar
- 2 tbsp chopped chives
- 2 slices cooked bacon, crumbled (optional)
- Nonstick spray
Instructions:
- Preheat air fryer to 300°F (150°C). Spray the silicone mold lightly.
- Blend eggs, cottage cheese, milk, salt, and pepper until smooth (this makes them extra fluffy).
- Stir in cheddar, chives, and bacon if using. Divide into the mold cups, leaving a little headspace.
- Place mold on a trivet or rack. Air fry 12–15 minutes until set but still tender.
- Cool 1–2 minutes, then pop out and serve warm.
Great with hot sauce or a dollop of salsa. Mix-ins are flexible: spinach and feta, ham and Swiss, or roasted peppers. Freeze extras; reheat at 300°F for 4–5 minutes.
6. Pizza Pan: Crispy-Edge Detroit-Style Garlic Bread Pizza

A pizza pan with low sides and vents helps you nail crisp edges and a bubbly top. This Detroit-style riff uses garlic bread as the base, so it’s cheesy, buttery, and outrageously good for movie night.
Ingredients:
- 1 small loaf bakery garlic bread (par-baked), sliced lengthwise
- 1/2 cup pizza sauce
- 1.5 cups low-moisture mozzarella, shredded
- 12–15 pepperoni slices (or mushrooms for veg)
- 1 tbsp grated Parmesan
- 1 tsp olive oil
- Red pepper flakes and fresh basil, to finish
Instructions:
- Preheat to 400°F (200°C). Brush the pizza pan lightly with oil.
- Place garlic bread cut-side up. Spread pizza sauce to edges.
- Scatter mozzarella, letting some touch the pan for crispy cheese frills. Add pepperoni or veg. Sprinkle Parmesan.
- Air fry 8–10 minutes until cheese is browned and edges crisp.
- Top with basil and a pinch of red pepper flakes.
Try pesto and burrata, BBQ chicken, or margherita toppings. For a thicker base, use par-baked focaccia; for gluten-free, use GF garlic bread. Cut into squares and watch them disappear.
7. Dehydrator Racks: Sweet-Chili Pineapple and Apple “Chips”
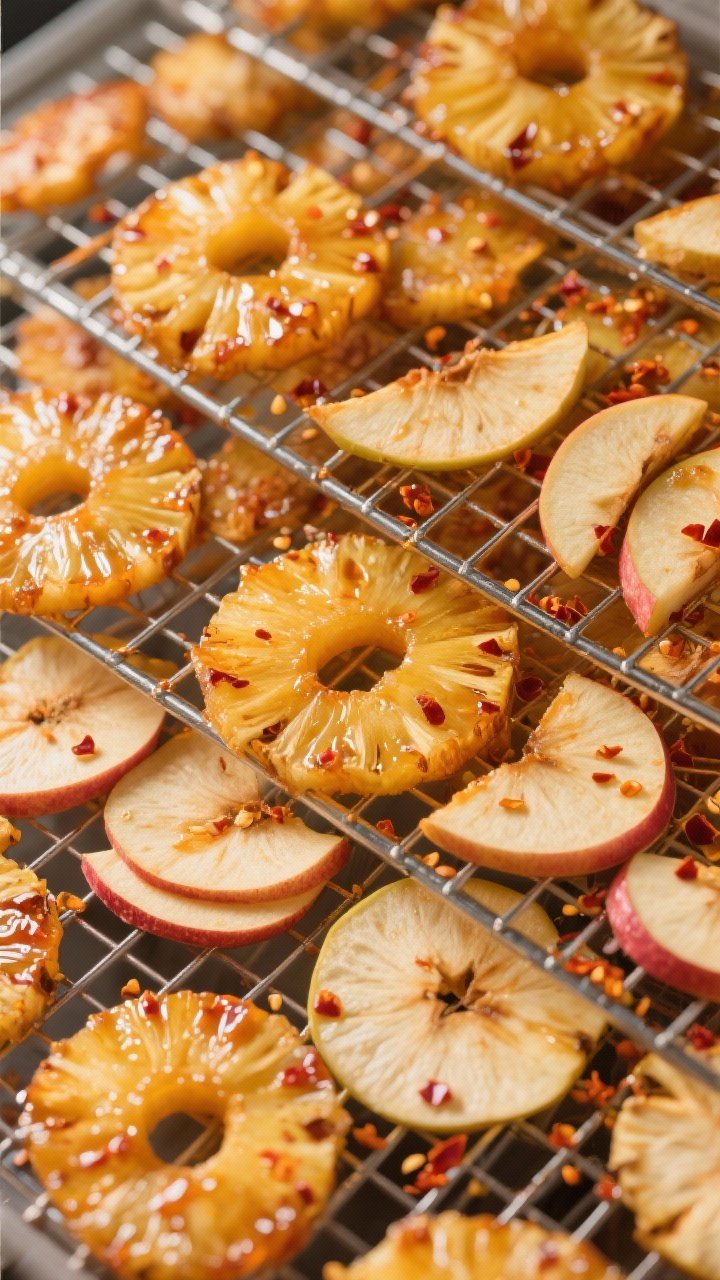
Stackable dehydrator racks turn your air fryer into a mini dehydrator. You’ll get chewy, candy-like fruit with a hint of spice—awesome for snacking, topping yogurt, or cocktails. Zero additives, all flavor.
Ingredients:
- 1 small pineapple, peeled and cored, sliced 1/4-inch
- 2 apples, cored and thinly sliced
- 1 tbsp lime juice
- 1 tbsp honey
- 1/4 tsp chili powder (or Tajín)
- Pinch of salt
Instructions:
- Whisk lime juice, honey, chili powder, and salt. Toss pineapple and apples gently to coat.
- Arrange on dehydrator racks in a single layer. Set air fryer to 160–175°F (70–80°C) or the lowest setting.
- Dehydrate 2.5–4 hours, rotating racks every hour, until edges are dry and centers are just tacky.
- Cool completely to crisp up slightly; store in an airtight jar.
Go savory with a dusting of smoked salt, or sweet with cinnamon-sugar apples. If your air fryer runs hot, crack the door slightly with a wooden spoon for airflow. Great garnish for sparkling water or rum punch—trust me.
8. Cake Barrel: Small-Batch Lemon Olive Oil Cake
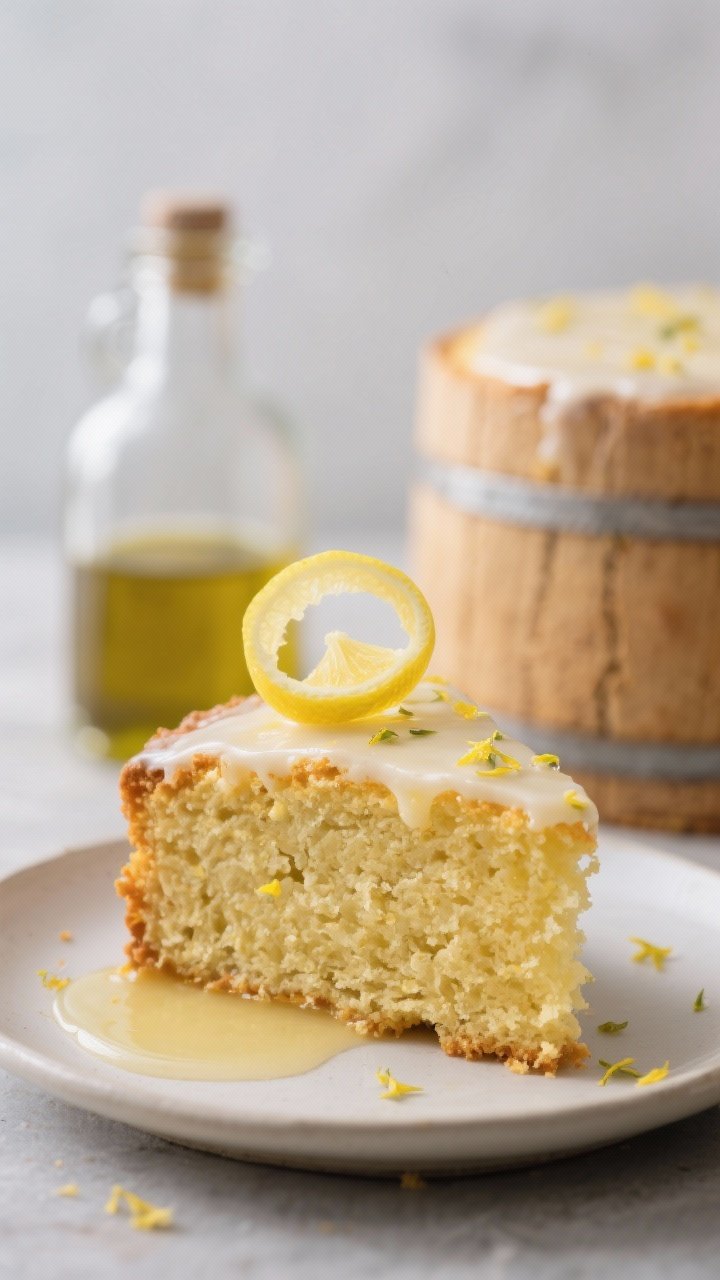
The cake barrel is your air fryer’s secret bakery: even heat, tender crumb, and no heating the whole kitchen. This lemon olive oil cake is bright, moist, and not too sweet—perfect with berries and whipped cream.
Ingredients:
- 1 cup all-purpose flour
- 1/2 cup granulated sugar
- 1/2 tsp baking powder
- 1/4 tsp baking soda
- 1/4 tsp kosher salt
- 2 large eggs
- 1/3 cup extra-virgin olive oil
- 1/3 cup whole milk or almond milk
- 2 tbsp lemon juice
- 1 tbsp lemon zest
- 1 tsp vanilla extract
- Powdered sugar, for dusting
Instructions:
- Preheat to 320°F (160°C). Grease and line the cake barrel with parchment.
- Whisk dry ingredients in one bowl. In another, whisk eggs, oil, milk, lemon juice/zest, and vanilla.
- Combine wet and dry until just mixed. Pour into barrel and smooth.
- Air fry 22–28 minutes until a tester comes out clean. Cool 10 minutes, then remove and dust with powdered sugar.
Serve with macerated strawberries or a spoon of Greek yogurt. Swap lemon for orange and add a pinch of cardamom for a cozy twist. If top browns too quickly, tent with foil for the last 5 minutes—seriously helpful.
9. Toast Rack/Multilevel Rack: Crispy Breakfast Sandwich Hack
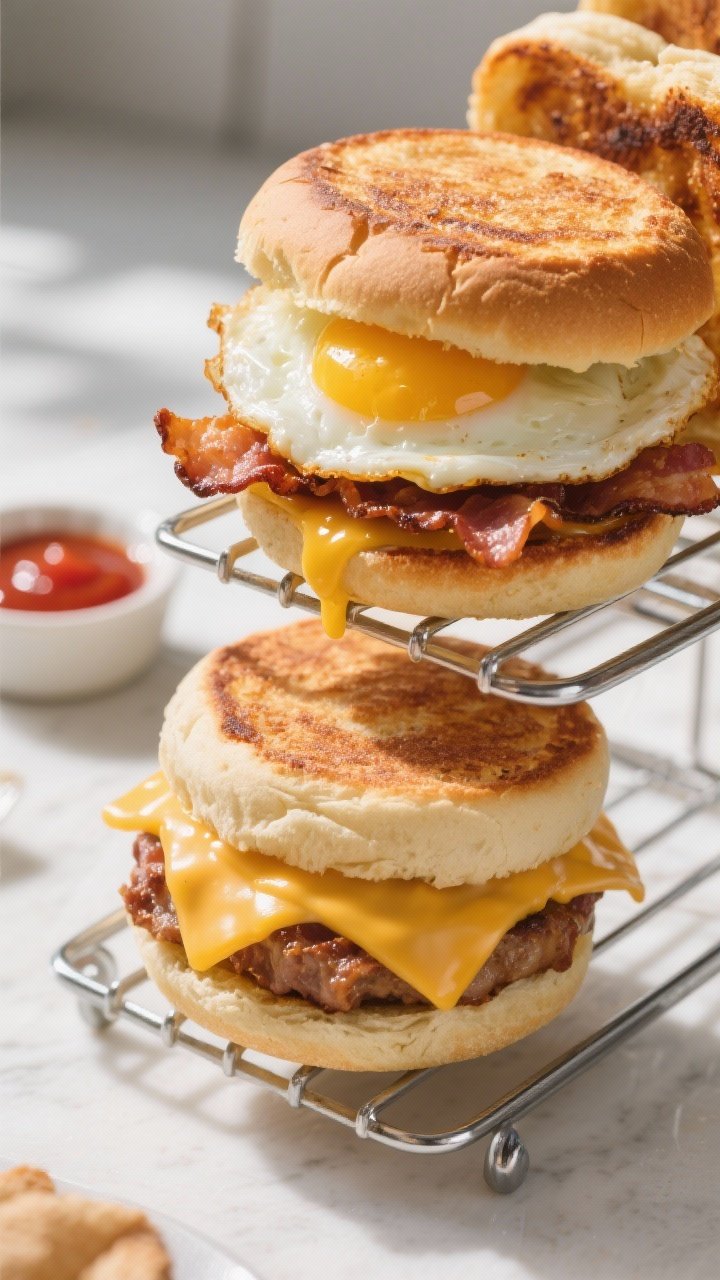
A multilevel rack lets you cook components at once—toast, bacon, and eggs all in one go. Breakfast sandwich assembly line? Activated. You’ll be eating in under 15 minutes without five pans to wash.
Ingredients:
- 2 English muffins, split
- 4 slices bacon or turkey bacon
- 2 eggs
- 2 slices cheddar
- 1 tbsp butter or mayo
- Salt and pepper
- Nonstick spray
Instructions:
- Preheat to 380°F (193°C). Spray two small ramekins or silicone cups and crack an egg into each; season lightly.
- Arrange bacon on the lower multilevel rack tier. Place ramekins on the upper tier. Air fry 6–8 minutes until bacon is crisp and eggs are set.
- Remove eggs and bacon. Add English muffin halves to the rack and toast 2–3 minutes.
- Spread muffins with butter or mayo, layer bacon, egg, and cheddar. Return assembled sandwiches for 1–2 minutes to melt.
Add avocado, hot sauce, or tomato. For a meatless version, use veggie sausage patties cooked alongside. Pro tip: poke the egg yolk before cooking if you prefer no runny centers.
10. Silicone Tongs and Rack Puller: Sticky Gochujang Wings Without the Mess
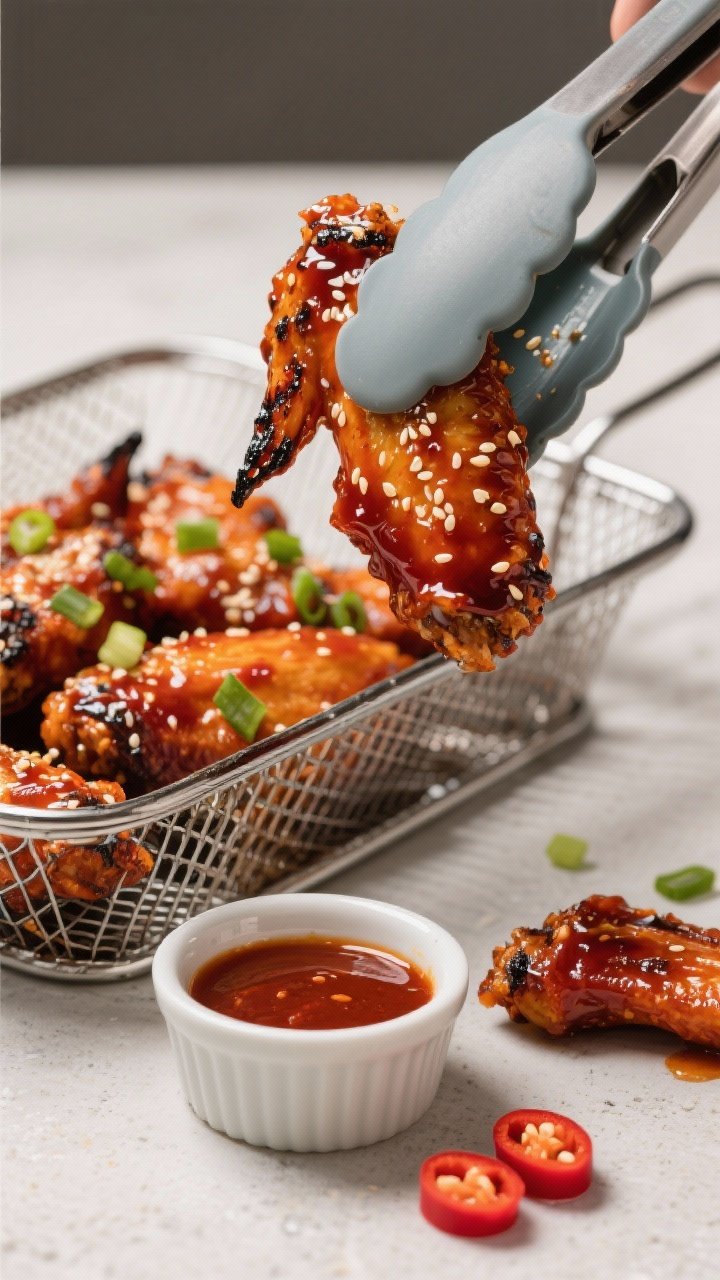
Not glamorous, but silicone-tipped tongs and a rack puller are lifesavers—no scratching your basket and no juggling hot trays. Perfect for saucy wings where you need to toss mid-cook and yank the rack safely. These are glossy, spicy-sweet, and dangerously snackable.
Ingredients:
- 2 lb chicken wings, flats and drums separated
- 1 tsp kosher salt
- 1/2 tsp black pepper
- 1 tsp baking powder (aluminum-free)
- 1 tbsp cornstarch
- Nonstick spray
- 2 tbsp gochujang (Korean chili paste)
- 1.5 tbsp soy sauce
- 1.5 tbsp honey
- 1 tbsp rice vinegar
- 1 tsp sesame oil
- 1 garlic clove, minced
- Sesame seeds and sliced scallions, for garnish
Instructions:
- Pat wings very dry. Toss with salt, pepper, baking powder, and cornstarch.
- Preheat to 390°F (200°C). Spray basket lightly.
- Arrange wings in a single layer. Air fry 24–28 minutes, flipping with silicone tongs at the 12-minute mark.
- Meanwhile, whisk gochujang, soy, honey, vinegar, sesame oil, and garlic.
- Transfer wings to a bowl using the rack puller to safely remove the hot basket. Toss with sauce. Return to fryer for 3–4 minutes to set the glaze.
- Garnish with sesame seeds and scallions.
Serve with quick pickles or kimchi. For milder heat, swap some gochujang for ketchup. You can also use the same method for BBQ or lemon pepper—just change the sauce.
Final Tips for Choosing Air Fryer Accessories
– Measure your basket or drawer before buying—every model is different.
– Look for perforations or venting to keep airflow strong and texture crisp.
– Favor silicone and nonstick-safe tools to protect your coating.
– Preheat inserts like the grill pan for better sear, just like a skillet.
– Don’t crowd. The magic of the air fryer is in the hot air circulation.
There you go: 10 accessories that actually earn their keep—and 10 recipes to prove it. Pick one, preheat, and let that little machine surprise you. Your future weeknights (and your sink) will thank you.
Printable Recipe Card
Want just the essential recipe details without scrolling through the article? Get our printable recipe card with just the ingredients and instructions.