10 Spice Storage Solutions for Real-life Cooks (not Just Pinterest) You’ll Actually Use
You know that spice avalanche that happens when you just need cumin and end up with turmeric on your socks? Yeah, we’re fixing that today. These 10 spice storage solutions are built for real kitchens, real budgets, and real weeknight cooking—no label-maker guilt required. We’re talking clever layouts, easy grab-and-go systems, and setups that keep your flavors fresh, visible, and ready to work.
Pick one, mix a few, or go all in. The goal: stop hunting, start cooking, and let your spices spark more joy (and less chaos) in your kitchen. Let’s get your paprika power back.
Looking for fast weeknight ideas? See our 10 Quick and Easy Dinners.
10 Spice Storage Solutions for Real-life Cooks You’ll Actually Use
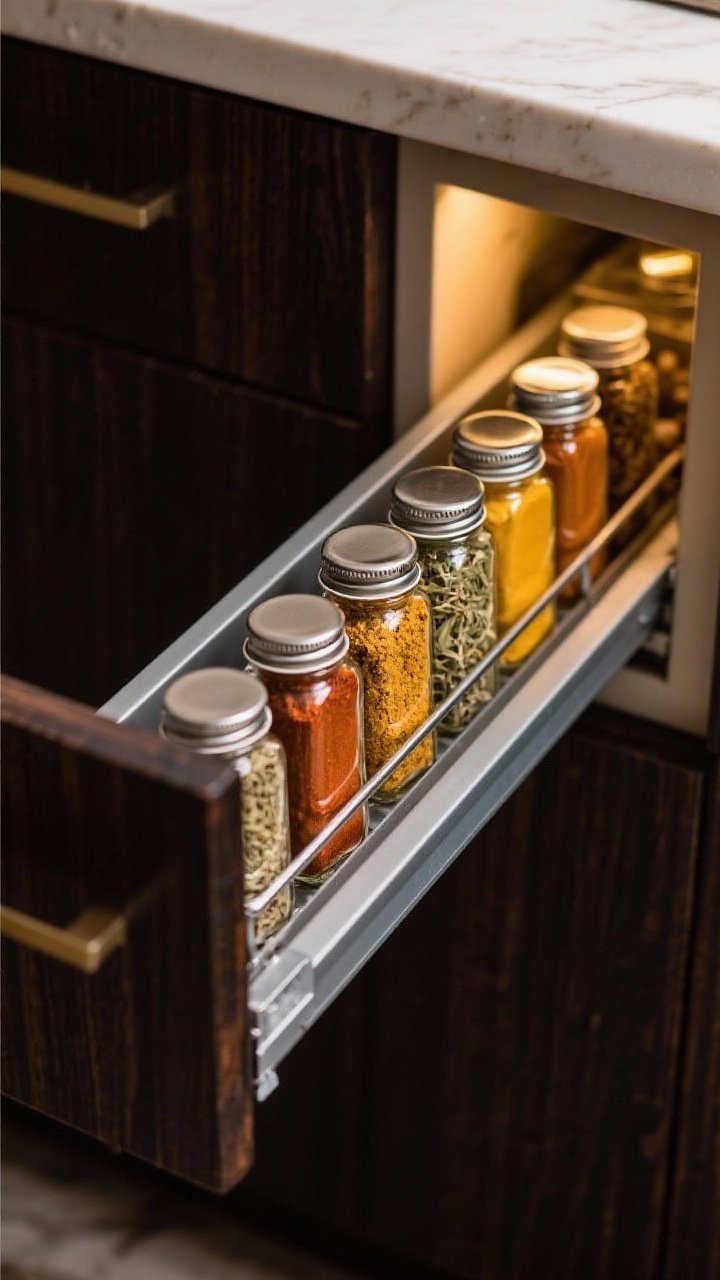
1. Drawer Spice Grid That Makes Weeknights Faster
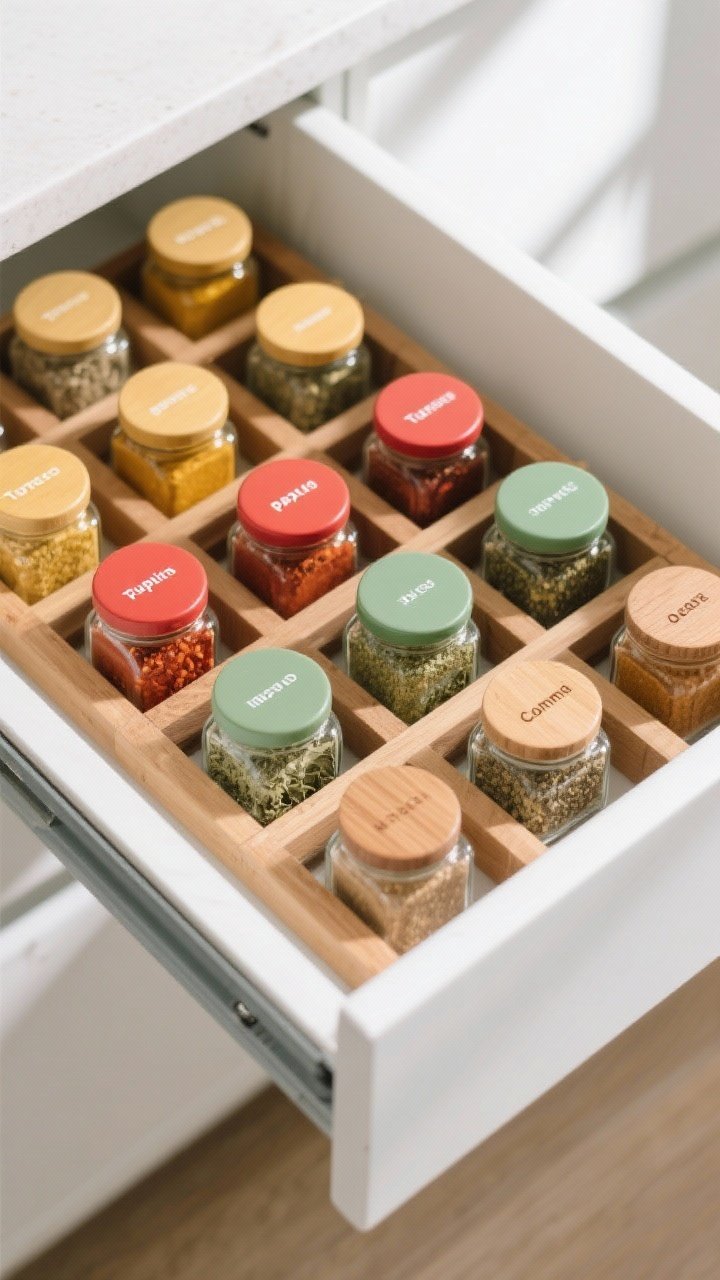
This low-profile drawer setup turns rummaging into a quick glance. It’s awesome if you cook often and want everything laid out like a tasting flight. No more digging behind dusty chili flakes—just flip the drawer, read the labels, and start sizzling.
Ingredients:
- 1 shallow kitchen drawer (at least 3 inches deep)
- Expandable drawer spice rack insert or angled foam liner
- 24–36 uniform spice jars (2–4 oz), ideally clear with shaker tops
- Waterproof labels (top-facing), plus a fine marker
- Small funnel for transferring spices
- Optional: silica gel packs for humidity control
Instructions:
- Measure your drawer’s width, depth, and height. Choose an insert that fits snugly so jars won’t slide around.
- Wash and dry your new jars thoroughly. Moisture is the enemy—make sure they are bone-dry.
- Transfer spices using the funnel. Fill only to about 80%—airflow helps keep them fresher when opening and closing.
- Label the jar tops with clear, large text. Add purchase/open dates on the underside if you’re the organized type.
- Arrange jars alphabetically or by cuisine (e.g., Baking, Indian, Mediterranean). Keep high-use front and center.
- Place a silica gel pack at the back if your kitchen runs humid.
Serving suggestion for your drawer: keep a mini measuring spoon set nearby to stop wandering. Variation: use angled bamboo organizers to tilt labels up for easier reading. Pro tip: If the drawer is near heat, shift it away—spices hate heat and light.
2. Magnetic Fridge Wall That Actually Looks Chic
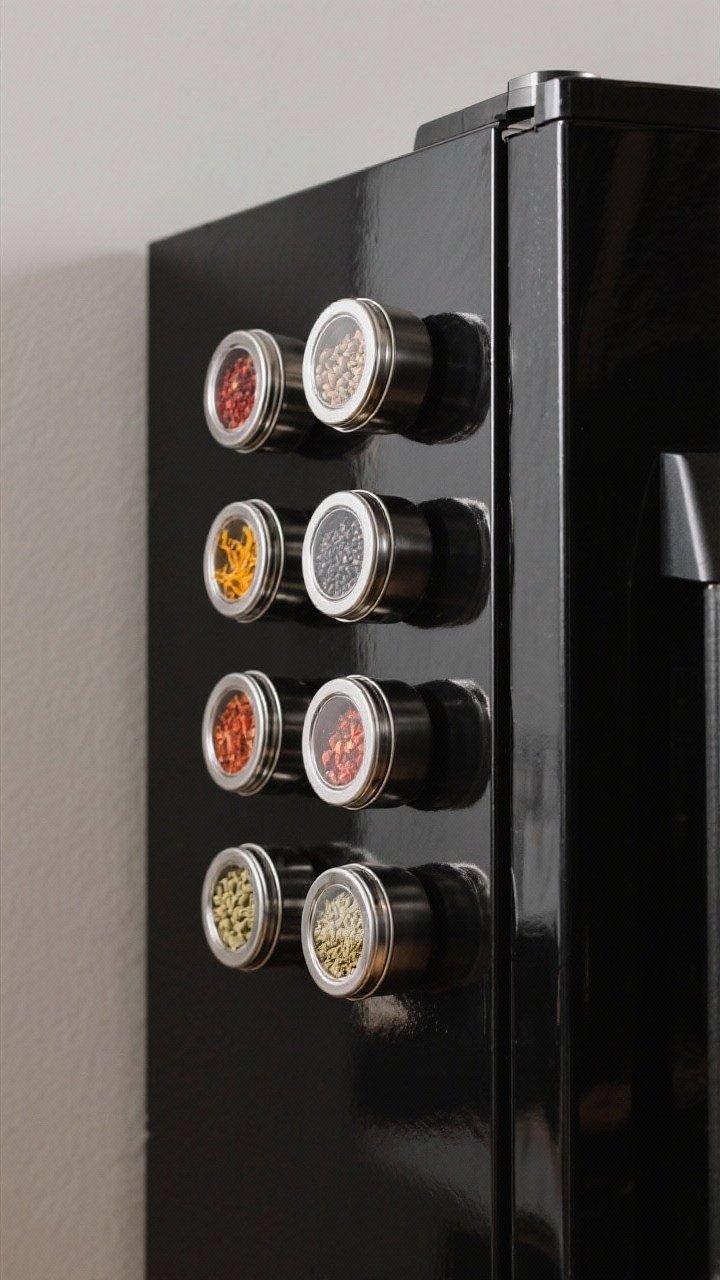
Short on cabinet space? Go vertical with a sleek, magnetic spice display. It’s perfect for small kitchens and renters and keeps spices in your line of sight—so you’ll actually use the za’atar you bought last spring.
Ingredients:
- Strong magnetic spice tins with clear lids (12–24)
- A steel panel or the side of your fridge
- Chalk marker or label stickers
- Optional: magnetic risers or shelves for heavier jars
Instructions:
- Test your fridge side with one loaded tin to ensure it holds (some fridges are not strongly magnetic). If not, mount a steel panel with adhesive strips.
- Fill tins up to three-quarters full. Overstuffing makes them hard to open and spills happen—ask me how I know.
- Label lids clearly. If you’re using chalk marker, let it dry fully to prevent smudges.
- Arrange by color or cuisine category for instant visual satisfaction. Keep heavier tins lower.
- Rotate out any faded or stale spices every 6–12 months.
Use this when you need a grab-and-go system next to your prep zone. Variation: keep daily-use blends (e.g., taco, garam masala, everything seasoning) in the prime row. Pro tip: Avoid direct sunlight to prevent flavor fade.
📥 Save Time This Week!
Get our FREE 7-Day Dinner Plan + Grocery List — all the recipes, shopping lists, and meal prep tips you need to breeze through the week.
Instant download. No spam, just delicious dinners. Unsubscribe anytime.
3. Lazy Susan Spice Tower That Solves Corner Cabinets
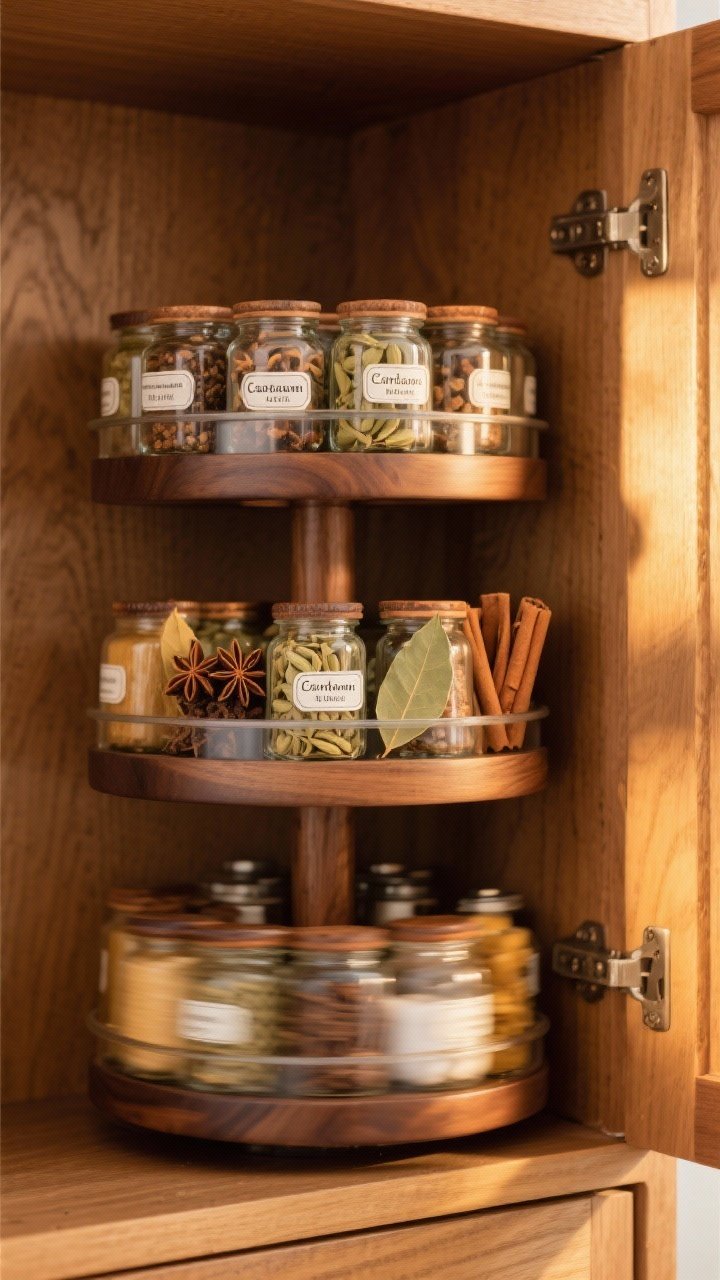
Those awkward corner cabinets can be gold with the right spinner. A double-decker lazy Susan lets you store a ton without losing anything to the dark tunnel of doom. Give it a whirl—literally.
Ingredients:
- 1–2 two-tier lazy Susans (10–12 inches diameter)
- Assorted spice jars or original containers
- Clear label tape or pre-printed labels
- Optional: tiered risers for taller back rows if not using a tiered turntable
Instructions:
- Measure cabinet width and depth, including door clearance. Choose a turntable that spins freely without scraping.
- Group spices by frequency of use. Top tier gets daily heroes; bottom tier gets special guests.
- Label jar fronts and tops so you can see names from any angle.
- Place tallest jars in the center to avoid tipping when spinning.
- Give it a test spin and edit any wobblers. Add a non-slip liner if needed.
Serving suggestion: dedicate one turntable to baking and one to savory for fewer mix-ups. Variation: use a deep-wall rimmed turntable to corral odd sizes. Pro tip: Wipe the turntable monthly—spice dust builds up fast.
4. Over-the-Door Rack That Doubles Your Pantry
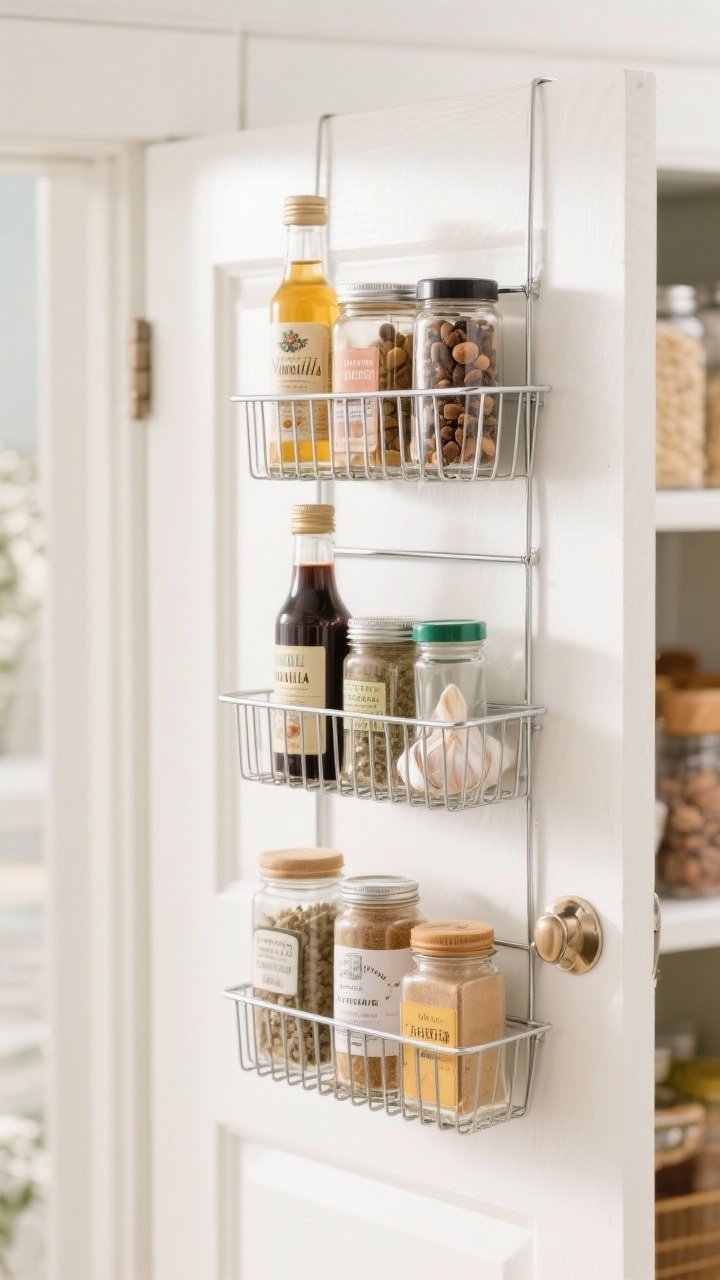
No pantry shelves left? The back of the door is prime real estate. A multi-tier over-the-door rack keeps bottles upright and visible—perfect for families and bulk buyers.
Ingredients:
- 1 over-the-door organizer with adjustable shelves
- Slim spice jars or original bottles
- Rubber bumpers or shelf liners
- Optional: zip ties to lock shelves in place
Instructions:
- Hang the rack and confirm door closes smoothly. If it wobbles, use included hooks or screws per instructions.
- Place a thin liner on each shelf to reduce rattling.
- Assign shelves by category: Herbs, Heat, Baking, Global, Blends. Keep hot sauces and vinegars separate if storing those too.
- Position heavier jars lower to avoid sway. Use zip ties to tighten any loose shelves.
- Label shelf edges for quick return-to-home behavior.
Great for households where everyone cooks—labels keep the peace. Variation: dedicate one shelf to “Use Next” spices to prevent waste. Pro tip: Avoid slamming the door—your paprika will thank you.
5. Slim Pull-Out Cabinet That Feels Custom (Without the Remodel)
Those 6-inch gaps beside your stove? They’re begging to be useful. A slide-out spice cabinet gives you chef-level access right where you cook, without tearing your kitchen apart.
Ingredients:
- 1 pull-out spice organizer (freestanding or insert)
- Mounting hardware if building into an existing cabinet
- Uniform spice jars to maximize space
- Heat-resistant labels
Instructions:
- Measure the gap or inside of the cabinet precisely: width, depth, height. These units are unforgiving.
- Install the pull-out per manufacturer instructions. Test the glide—smooth is key.
- Transfer spices to uniform jars to keep rows tidy. Label the front sides.
- Put everyday spices at hand height; seldom-used at the bottom or top.
- Keep the unit at least 6–12 inches away from direct oven heat if possible.
Serving suggestion: keep a small ramekin on the top shelf for measuring spoons. Variation: use a double-sided pull-out to double capacity. Pro tip: Store whole spices near the front—grinding fresh boosts flavor and saves space.
6. Pegboard Spice Wall For the Creative Cook
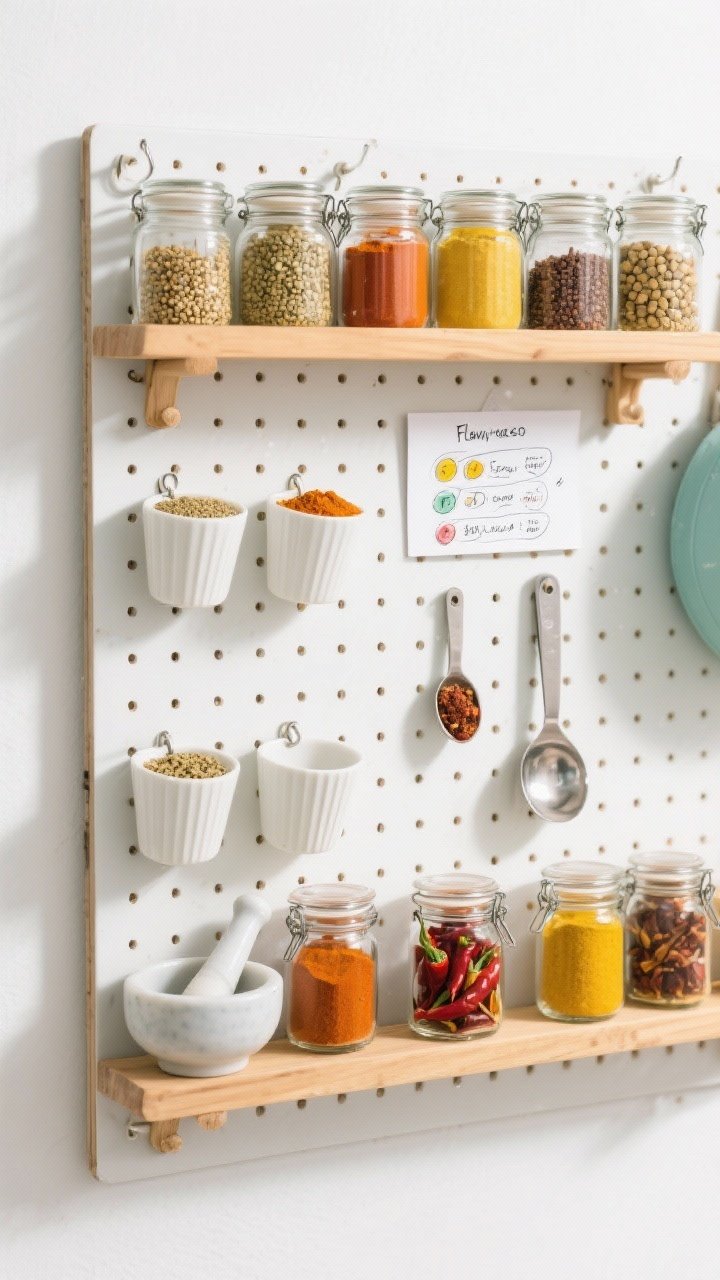
If your kitchen is tiny but your flavor game is big, a pegboard spice wall brings function and artsy vibes. It’s infinitely customizable and makes your spice collection feel like a palette.
Ingredients:
- 1 metal or wood pegboard (size to fit your space)
- Pegboard hooks, shelves, and baskets
- Clamp jars or clear-lidded jars with hookable handles
- Label maker or paint pens
- Anchors and screws for mounting
Instructions:
- Find a wall near prep but away from sunlight and heat. Studs are your friends—mount securely with anchors.
- Map your layout on the floor first: hooks for jars, small shelves for blends, a basket for refills.
- Transfer spices into clamp jars and label fronts clearly.
- Hang by category, or create a “recipe rail” with your go-to set for a favorite cuisine.
- Keep a small brush nearby to dust the board—open shelves collect seasoning pixie dust.
Serving suggestion: add a rail for measuring spoons and a mini notepad for “running low” reminders. Variation: color-code labels for cuisines. Pro tip: If using wood pegboard, add spacers for airflow behind the board.
7. Tiered Shelf Insert That Makes Old Cabinets New
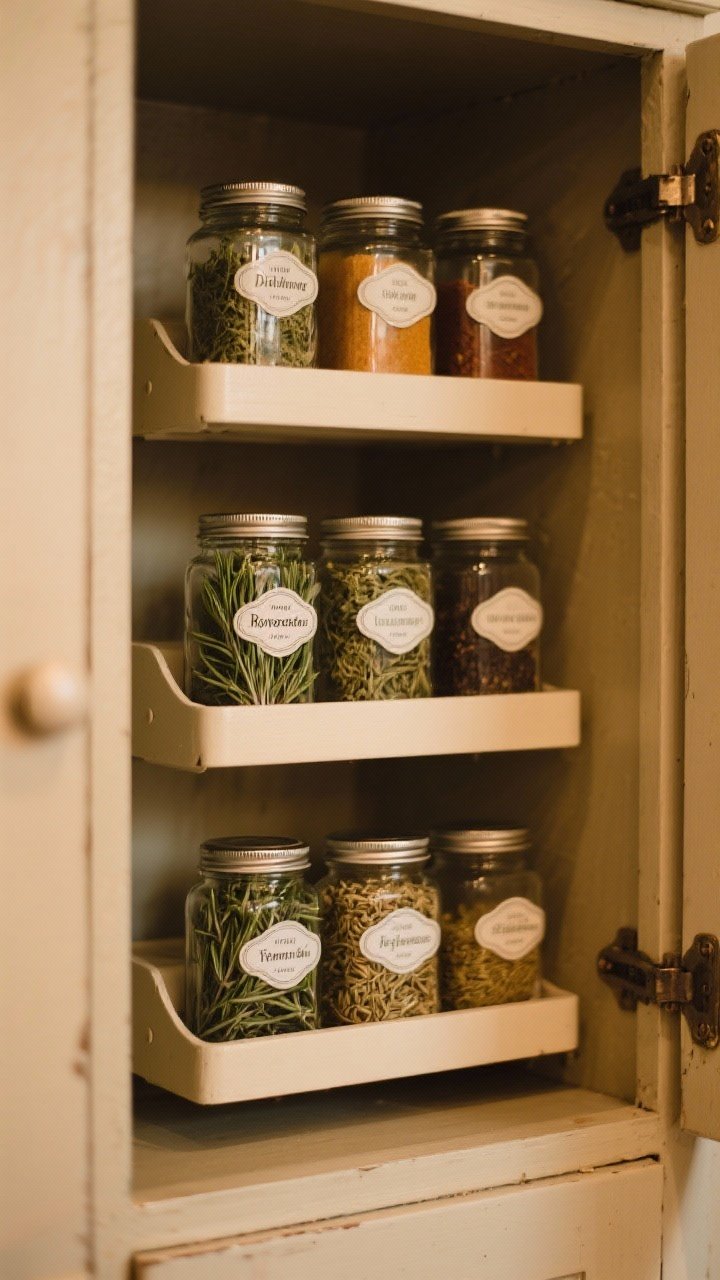
Cabinet chaos is solvable with a few strategic levels. Tiered shelf risers let you see everything at once—no more four-deep rows of mystery bottles.
Ingredients:
- 1–2 tiered shelf risers (adjustable width if possible)
- Your current spice jars or matching ones
- Clear labels or large-top labels
- Optional: LED strip light for dark cabinets
Instructions:
- Measure shelf width and depth. Choose risers that leave an inch or two up front for finger space.
- Place tallest jars at the back tier, shortest up front. Labels facing outward, always.
- Alphabetize, or group by meal type (Breakfast, Weeknight, Baking).
- Add a battery LED strip to the cabinet ceiling if it’s dim. Seeing the names matters.
- Do a quarterly sweep to remove old or clumpy spices.
Serving suggestion: stash emergency salt, pepper, and olive oil nearby for a one-stop seasoning station. Variation: use a U-shaped riser to wrap around hinges. Pro tip: Whole spices stay vibrant longer—give them the back row, then grind when needed.
8. Airtight Pantry Bins For Bulk Spices And Refills
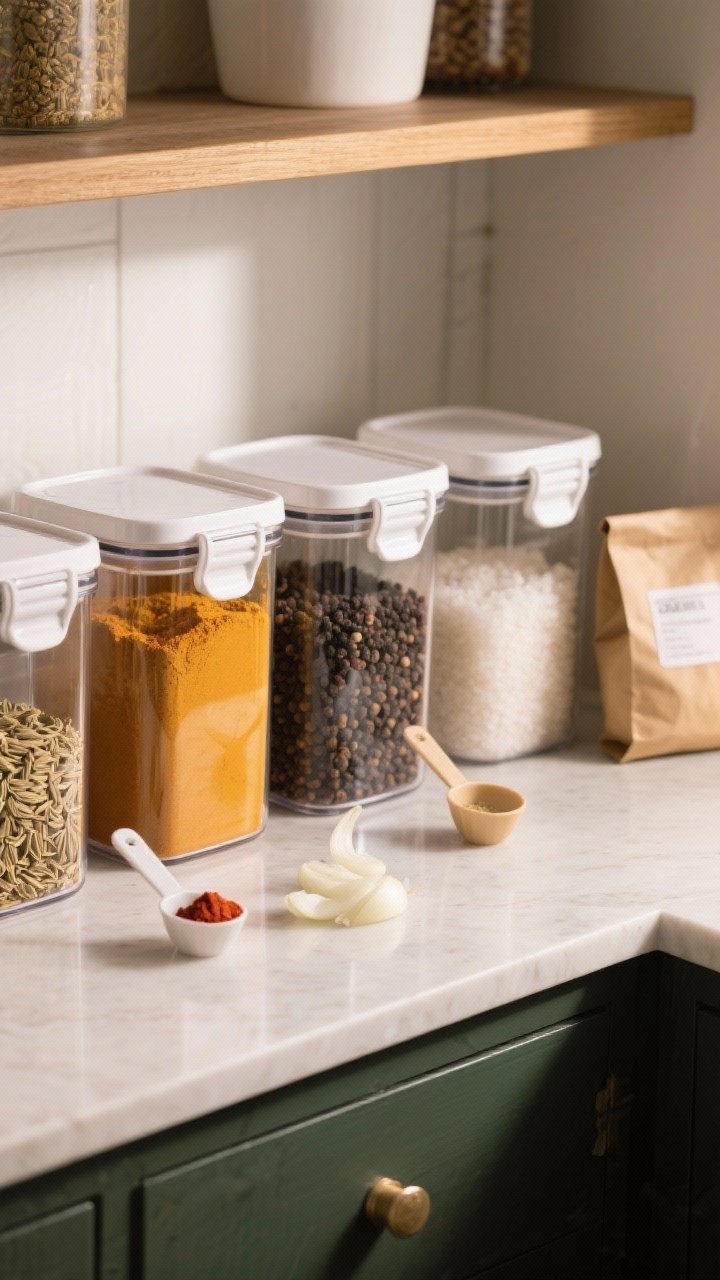
If you buy your cumin by the pound (respect), you need a refill system. Clear, airtight bins keep bulk spices fresh and make topping up small jars a breeze.
Ingredients:
- 3–6 airtight pantry bins (0.5–2 liters, depending on volume)
- Small spice jars for daily use
- Funnel set and measuring scoops
- Date labels for tracking freshness
- Optional: vacuum-seal bags for rarely used bulk
Instructions:
- Divide bulk spices: a small jar for cooking, the rest stored airtight and dark.
- Label bins with spice name, purchase date, and source. Quality varies—knowing the shop helps.
- Use a funnel to refill small jars every 1–2 months to keep things perky.
- Store bins on a cool, low shelf away from the oven. Heat is flavor’s kryptonite.
- Vacuum-seal rarely used spices (like whole star anise) in smaller portions to avoid waste.
This setup saves money and keeps flavors bright. Variation: pre-blend your favorite rubs in small batches and store them as “ready-to-go” jars. Pro tip: Write “toss by” dates—most ground spices peak within 6–12 months.
9. Countertop Caddy For the Everyday Essentials
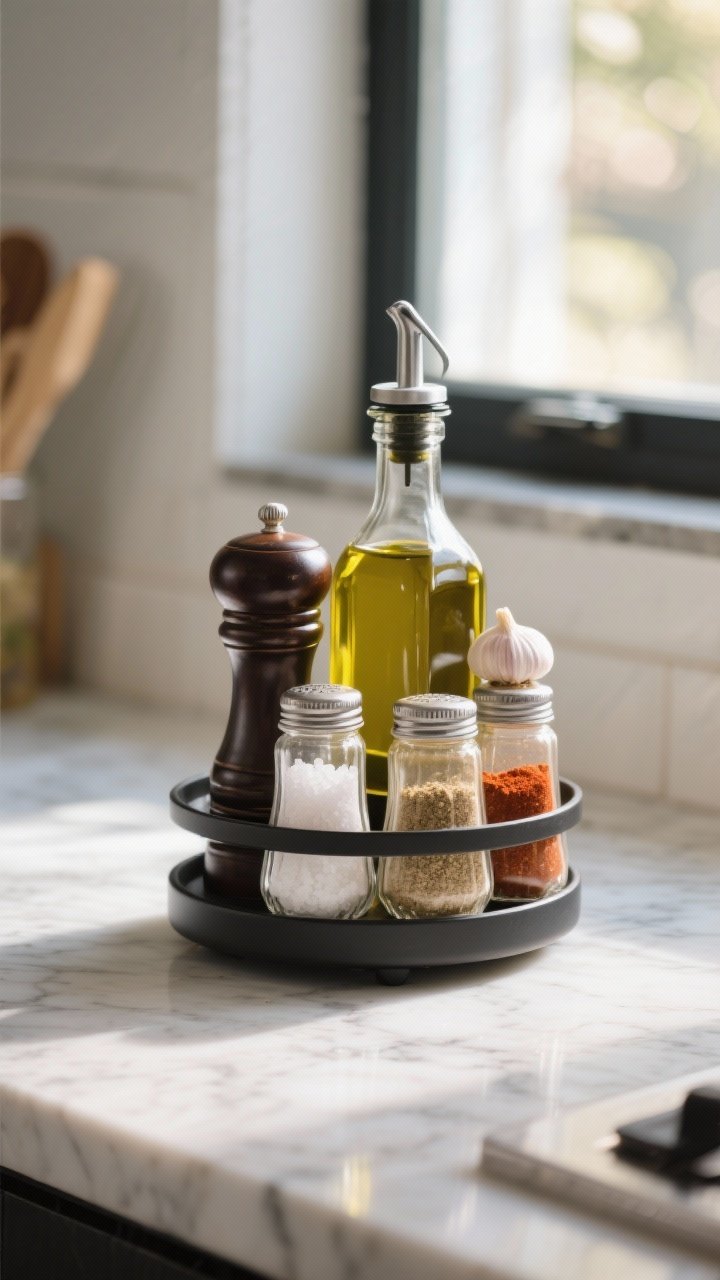
Some spices deserve VIP access. A compact countertop caddy keeps your daily favorites within reach without cluttering the scene. It’s the perfect blend of form and function.
Ingredients:
- 1 rotating countertop caddy or small tray with handle
- 8–12 spice jars (the ones you use most)
- Oil and vinegar bottles if desired
- Labels with bold text
- Optional: non-slip mat under the caddy
Instructions:
- Choose 8–12 spices you reach for constantly—think salt, pepper, garlic powder, smoked paprika, chili flakes, cumin, oregano, cinnamon.
- Transfer to matching jars for a clean look and easy labeling. Bold, high-contrast labels help when you’re mid-sauté.
- Place the caddy near your main prep area but away from direct heat.
- Rotate seasonal picks: pumpkin spice in fall, herbes de Provence in summer grilling season.
- Wipe the tray weekly—oil mist happens to the best of us.
Serving suggestion: keep a tiny tasting spoon in the caddy for quick checks. Variation: use a two-tier mini stand if counter space is tight. Pro tip: If sunlight hits your counter, choose opaque jars to preserve potency.
10. Alphabetized Binder For Packets, Peels, And Oddballs
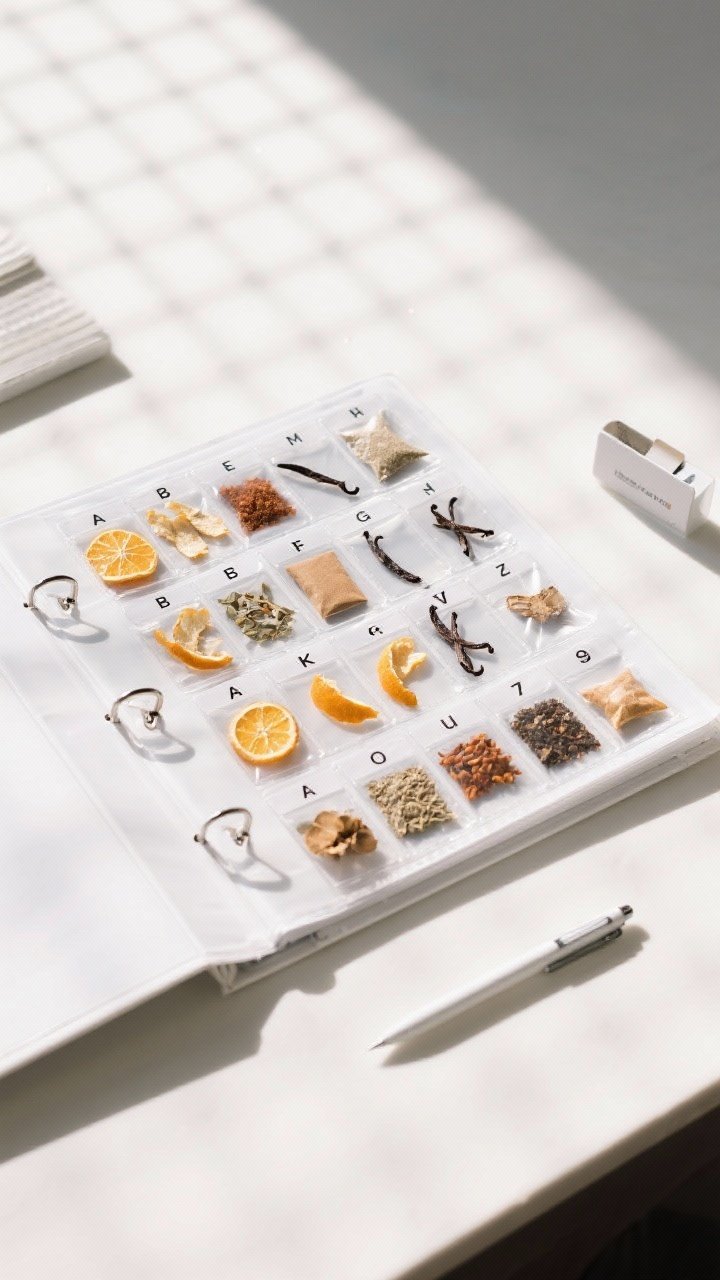
Saffron sleeves, vanilla beans, bay leaves in paper packets—these are the chaos agents. A binder with pockets tames the misfits and keeps them easy to find when you need that very specific flavor.
Ingredients:
- 1 sturdy three-ring binder or small accordion file
- Plastic photo sleeves, baseball card pages, or zip pouches
- Alphabet tabs or category dividers
- Sharpie and small labels
- Optional: silica gel packet inside the binder
Instructions:
- Sort all packets, pods, and peels. Toss anything faded, clumpy, or scentless—life’s too short for weak spices.
- Slip each item into a sleeve and label with the name and date. Group by alphabet or cuisine.
- Add a silica gel packet to reduce moisture, then store the binder upright on a cool pantry shelf.
- Keep a reference sheet in the front for conversions and quick notes (e.g., 1 cinnamon stick = 1/2 tsp ground).
- Do a quick monthly flip-through to keep track of what needs replacing.
Serving suggestion: pair this binder with your bulk bin system so refills are painless. Variation: dedicate a few sleeves to tea sachets or dried citrus wheels. Pro tip: This is also great for whole spice blends you bring back from travels—memory meets mise en place.
How To Make Your Spice System Last
Whichever setup you choose, a few habits keep it humming:
- Keep spices away from heat, light, and moisture.
- Label with dates and do a quick quarterly cleanup.
- Buy whole spices when you can; grind small batches.
- Use uniform containers for space efficiency and easy labeling.
- Store bulk separately from daily-use jars.
Quick Flavor Shelf Life Guide
- Whole spices: 1–3 years
- Ground spices: 6–12 months
- Dried herbs: 6–12 months
- Seeds with oils (sesame, flax): store cool; check for rancidity
Ready to retire the spice avalanche? Start with one solution and build from there. Your kitchen will feel calmer, your cooking will get quicker, and your flavors will pop like they’re supposed to. Seriously—future you, mid-recipe, will be so grateful.
Printable Recipe Card
Want just the essential recipe details without scrolling through the article? Get our printable recipe card with just the ingredients and instructions.